Getting started
This page is for whoever sets up the tablets. If that is you and you run the business rather than the IT, the Quick Start below is all you need to get a first order taken; each step links to a fuller guide your IT person can follow. If you are the IT person, read the Quick Start for the shape of it and then Connecting your ERP.
Rather enter everything by hand? You do not need an ERP or accounts system. A business, or a team on a trade show stand, can enter its products and customers manually on the tablet, then print the orders or collect them as spreadsheet files: see Entering everything by hand (manually).
Quick Start
Five steps, from opening the app to a first order. You can stop after the first one and come back: nothing you do in the demo is kept, and nothing in setup has to be done in one sitting.
Try the demo
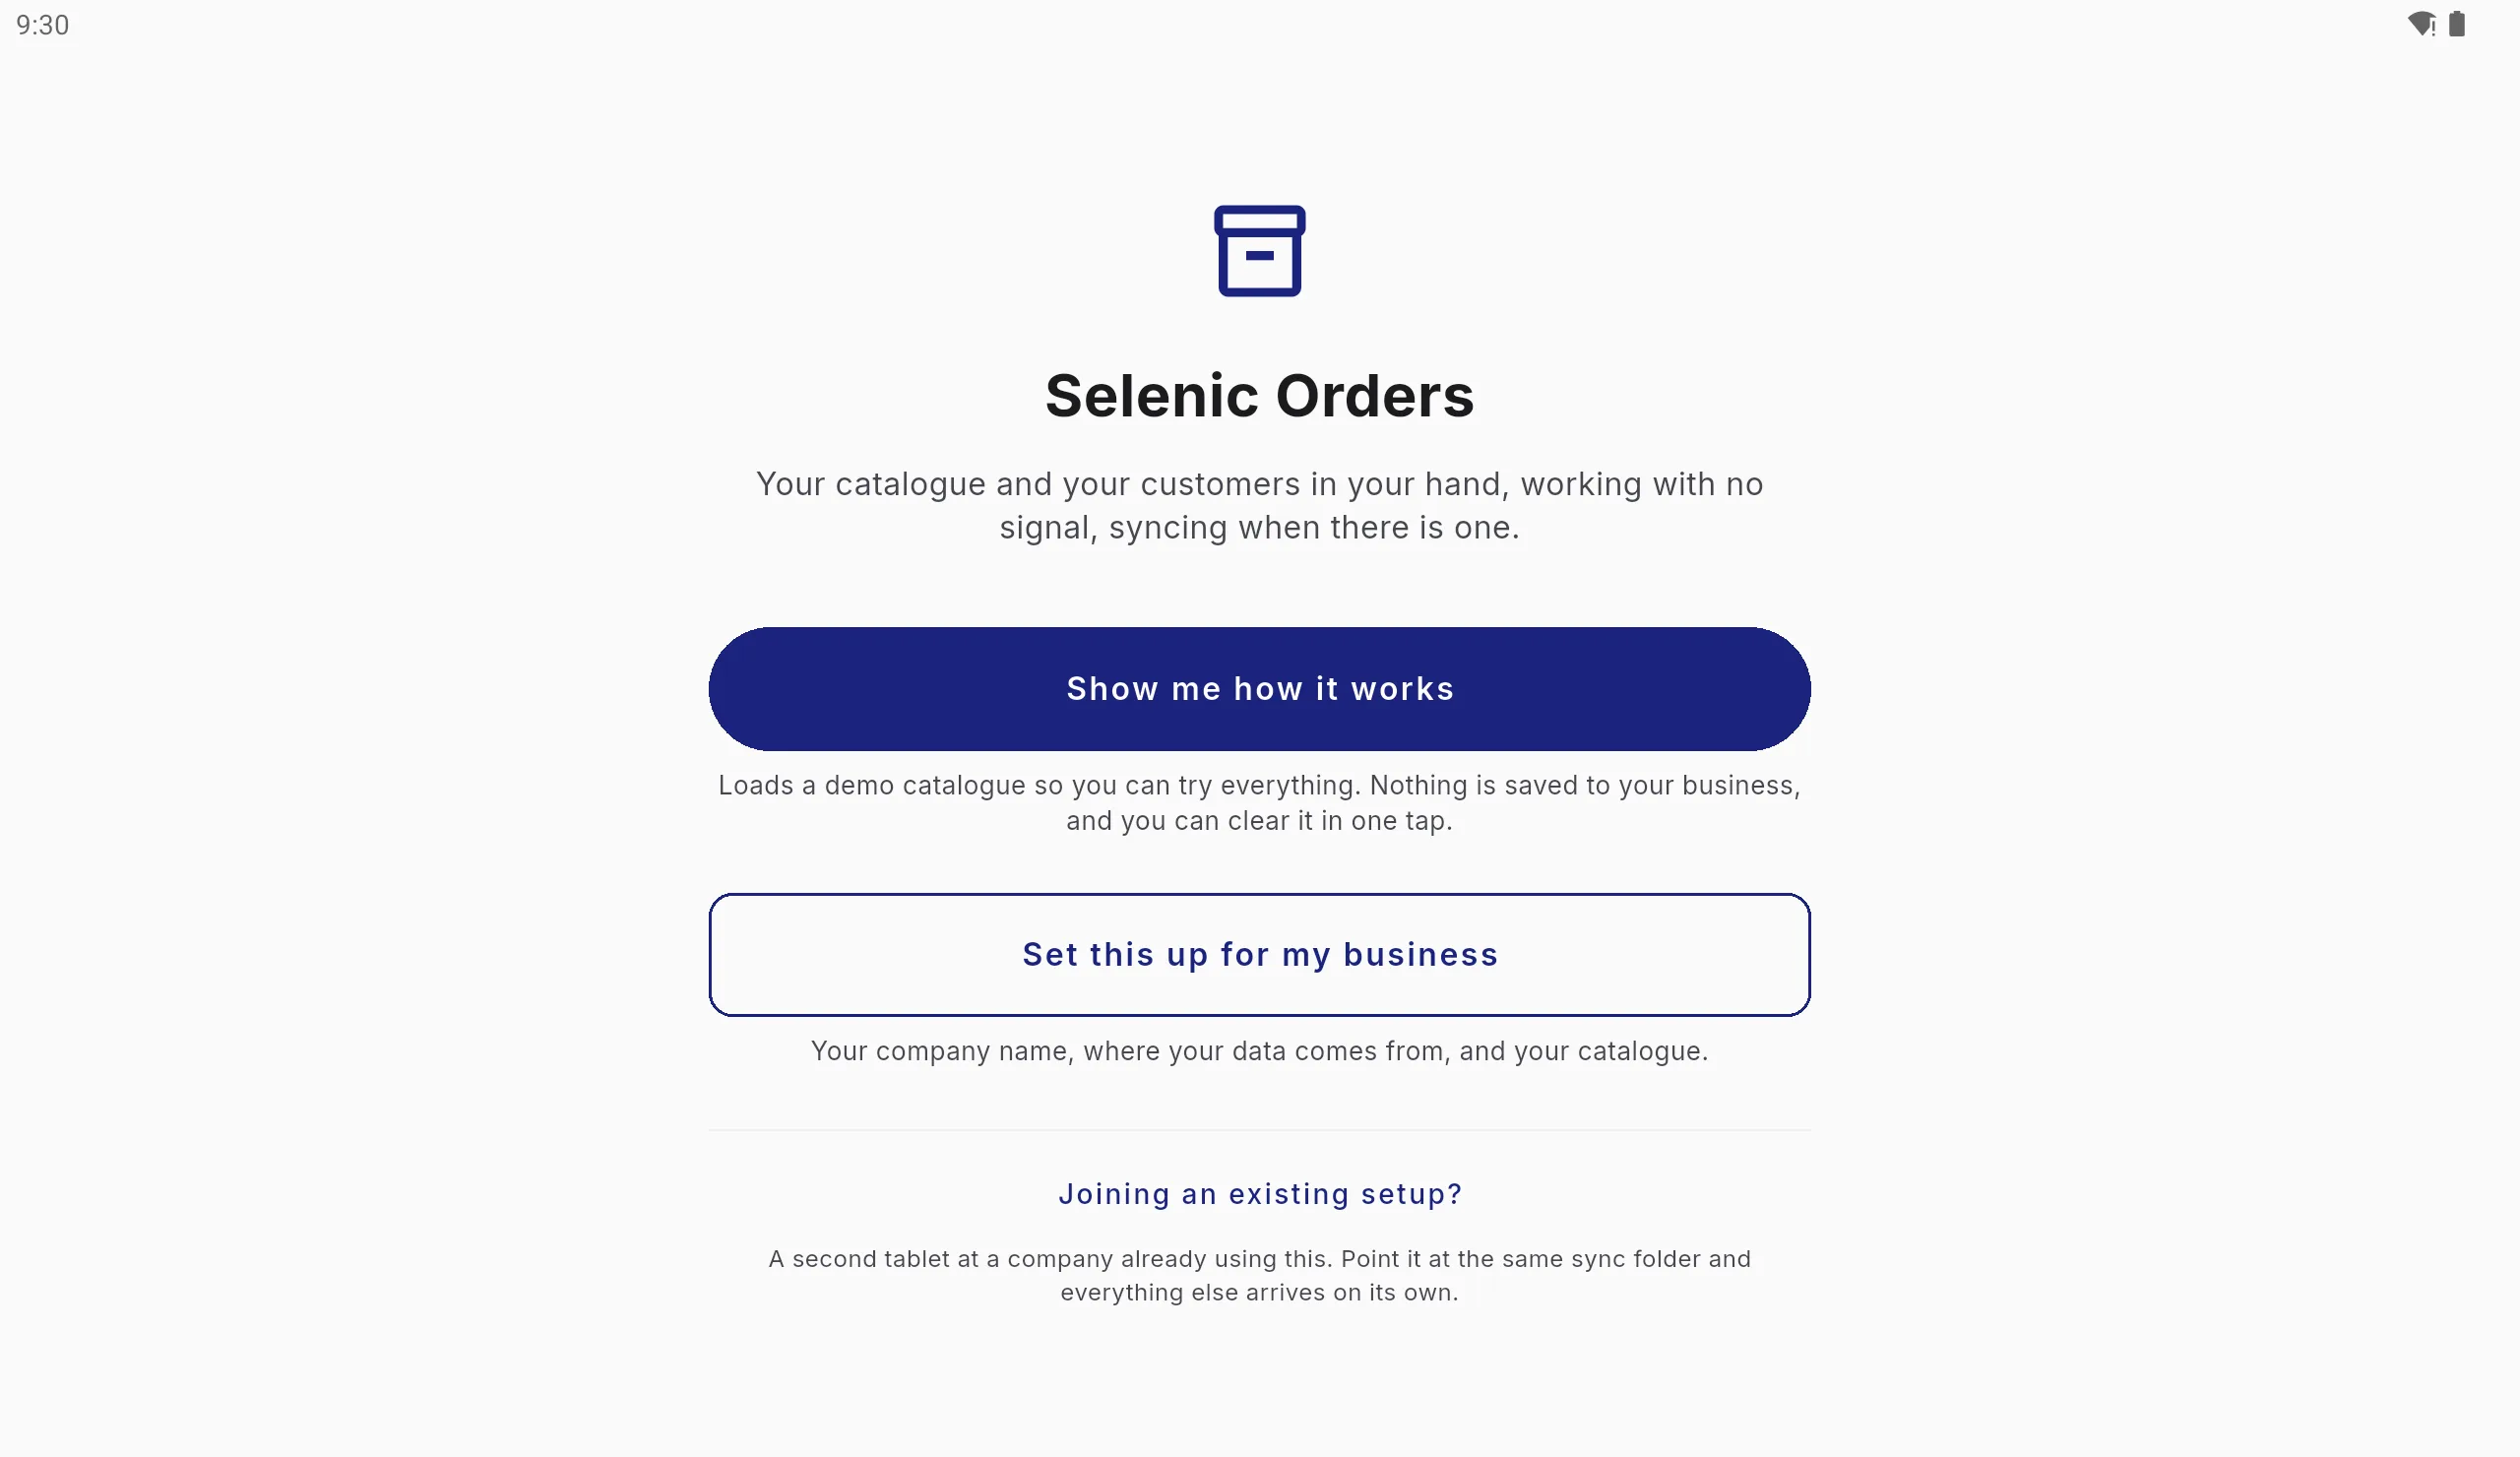
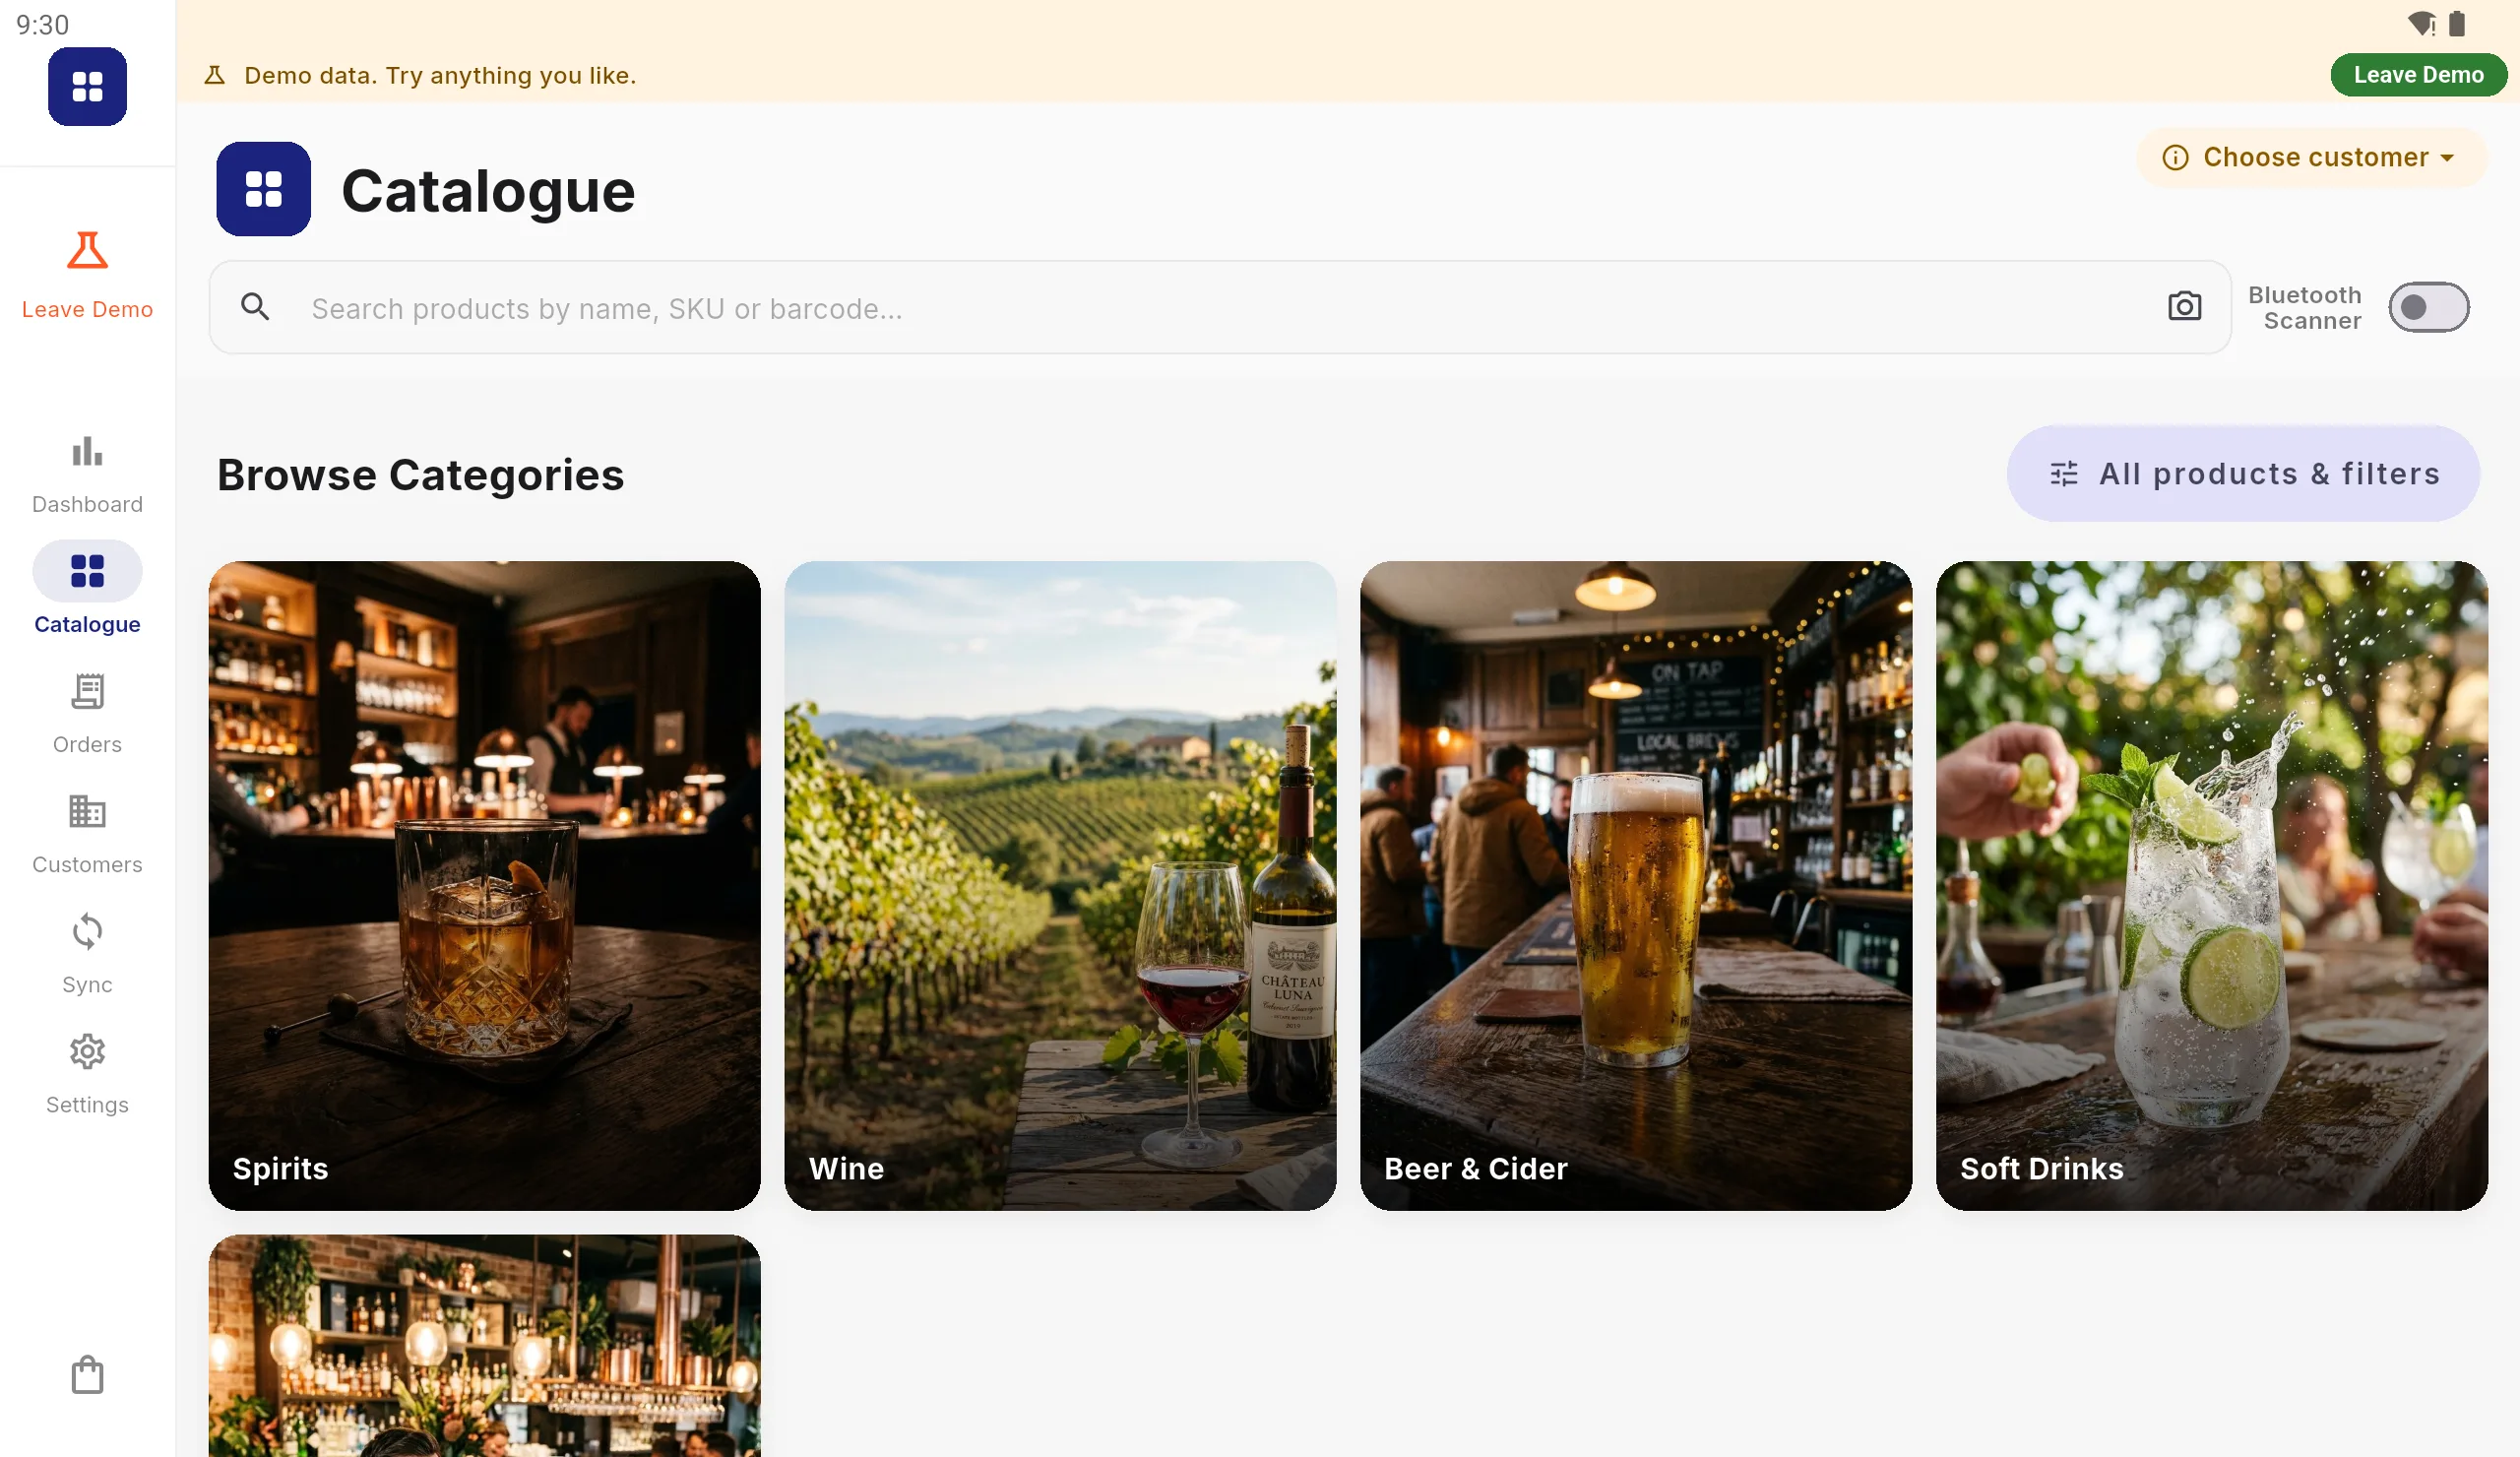
Open Selenic Orders. The first screen offers three choices. Press Show me how it works to load a sample drinks wholesaler, with a catalogue, customers and orders, and try anything you like.
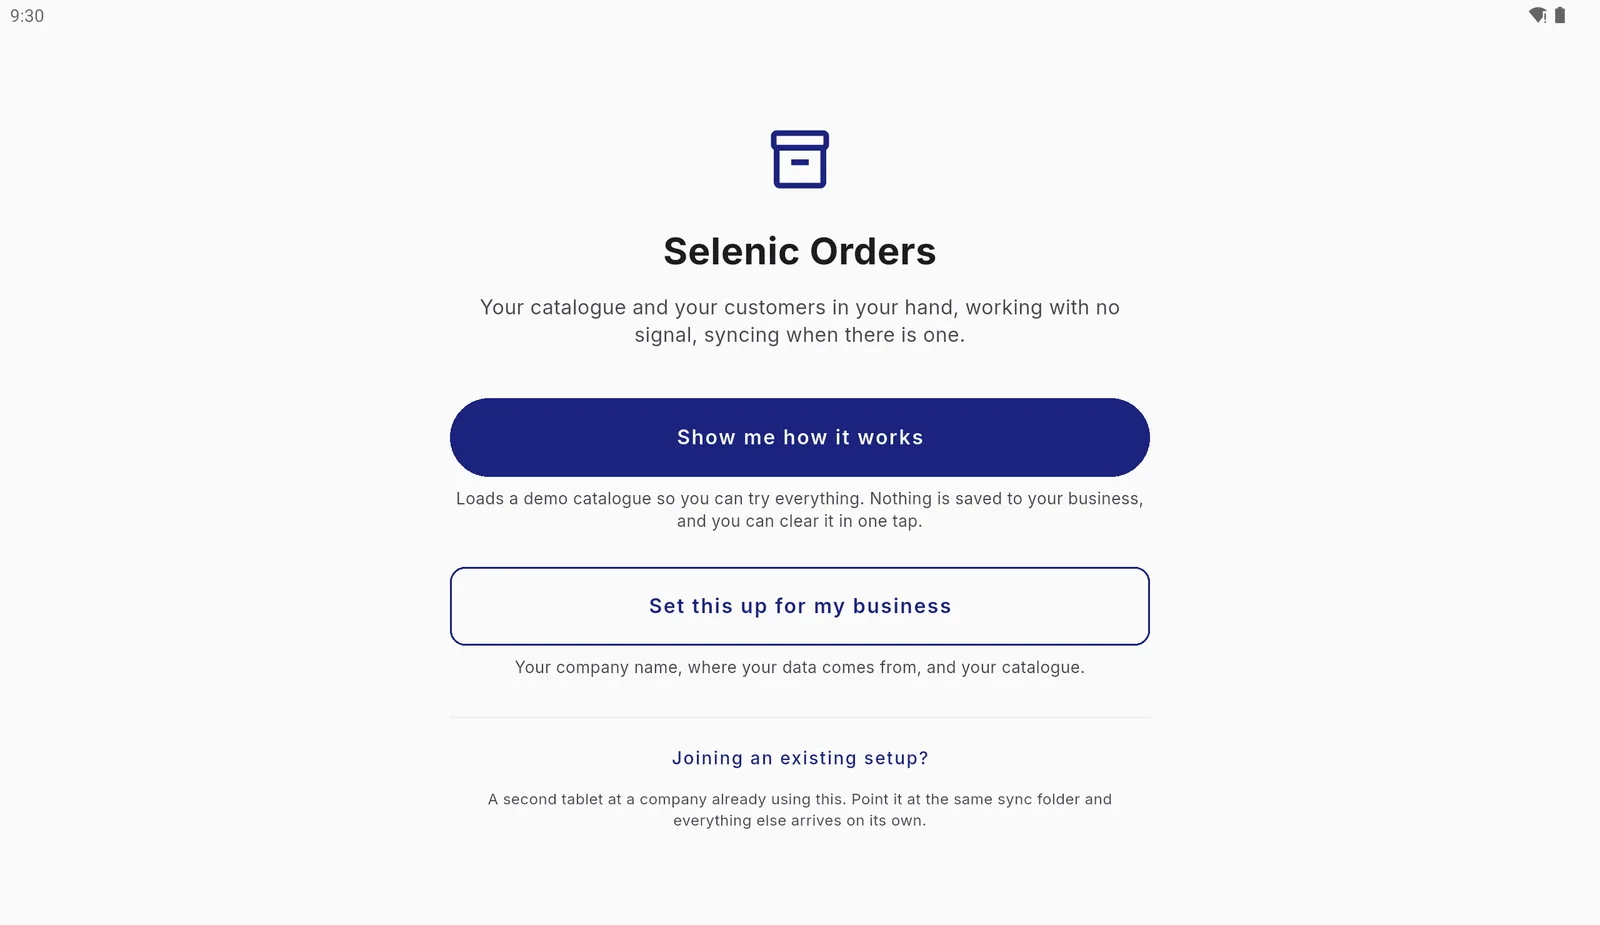
The first screen. Choose Joining an existing setup? instead if another tablet at your company already uses the app. 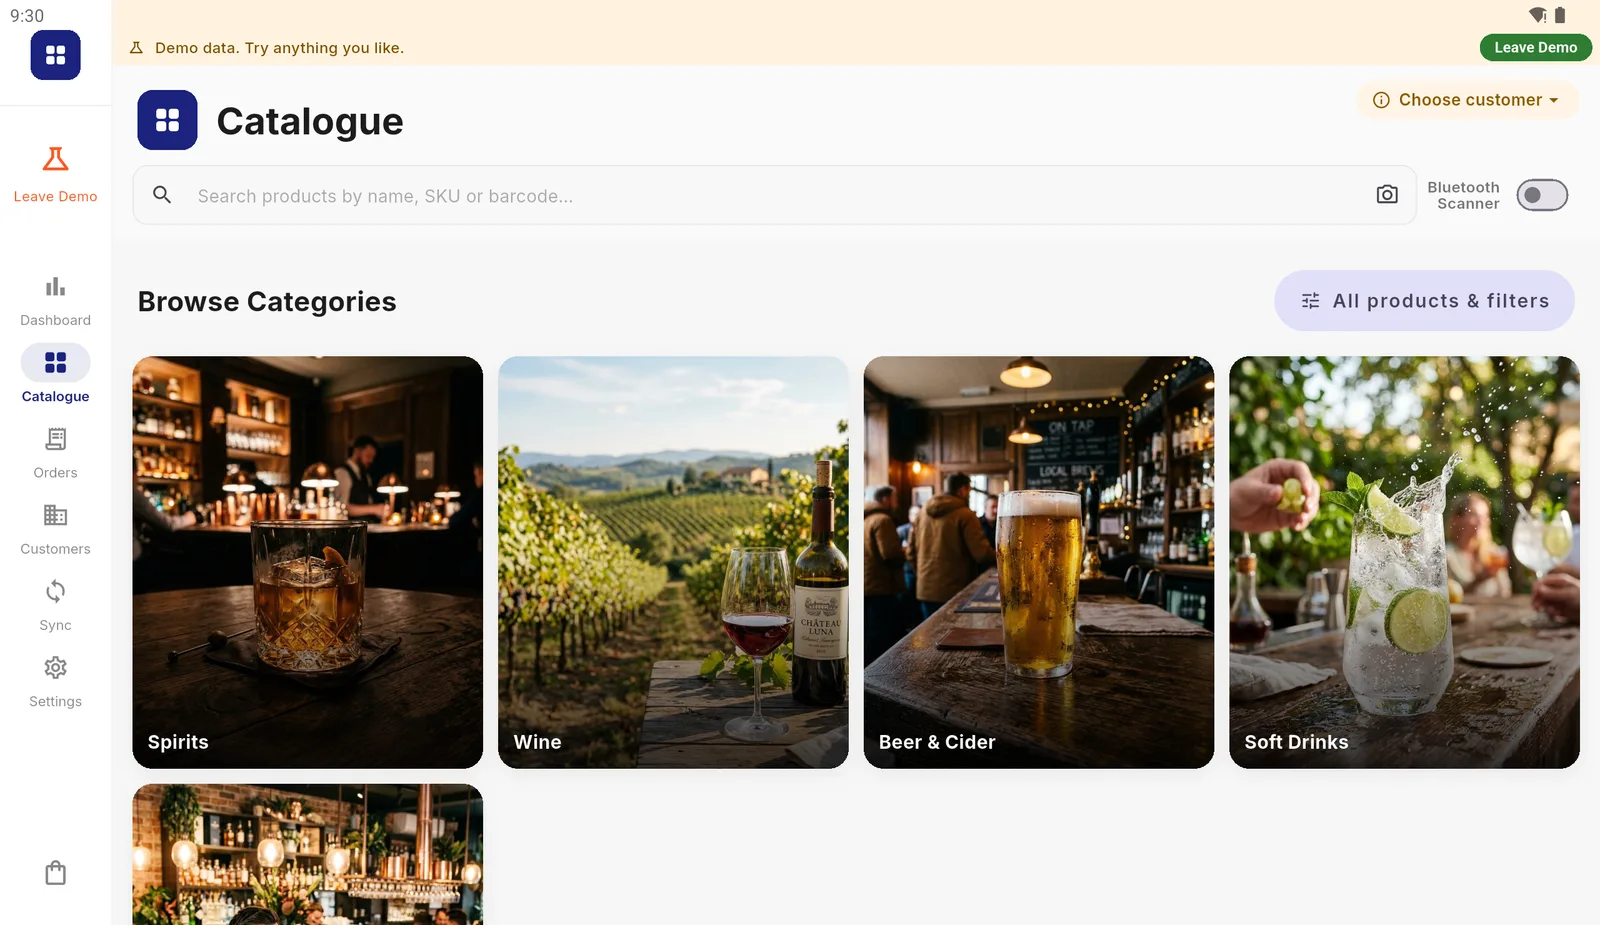
In the demo, a strip across the top says so. Leave Demo, on the strip or in the sidebar, clears the sample data and takes you back to the first screen. Enter your licence key
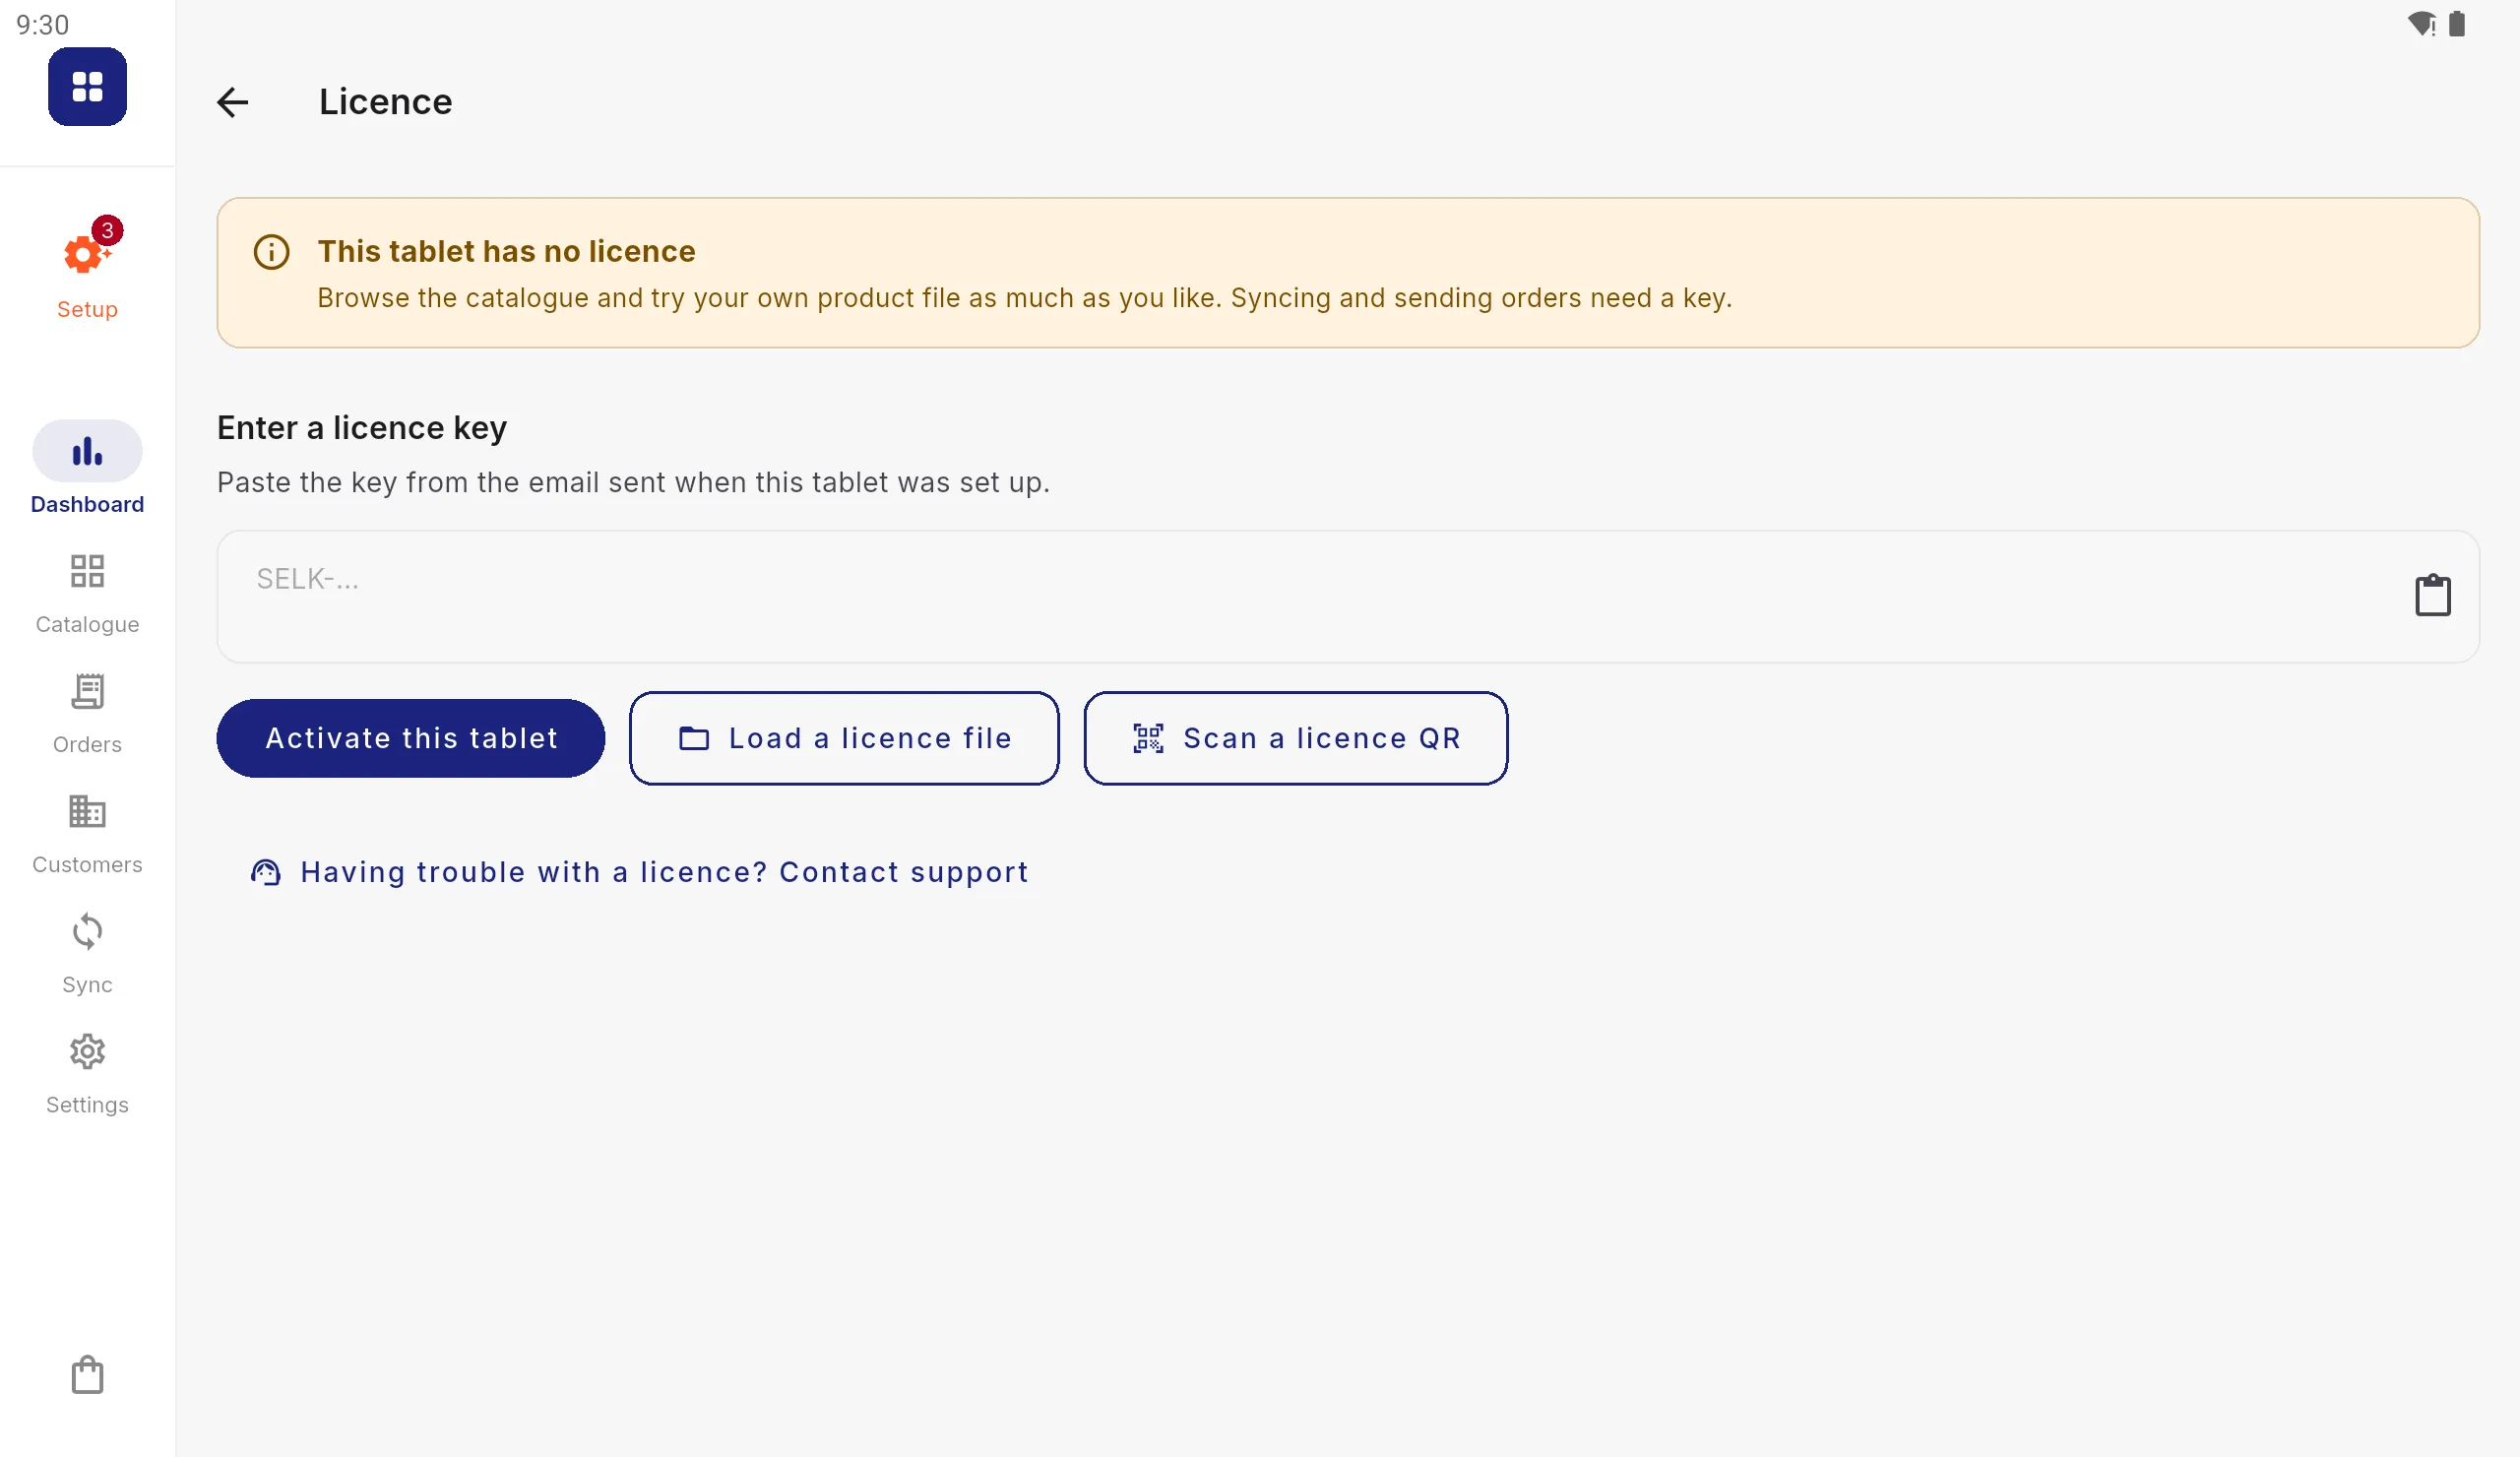
On the first screen press Set this up for my business. A short checklist opens. Tap Your licence key, paste the key from your email (it starts
SELK-) and press Activate this tablet. Activating needs an internet connection once; after that the tablet works offline.The key can also be loaded from a file with Load a licence file, or from a printed code with Scan a licence QR.
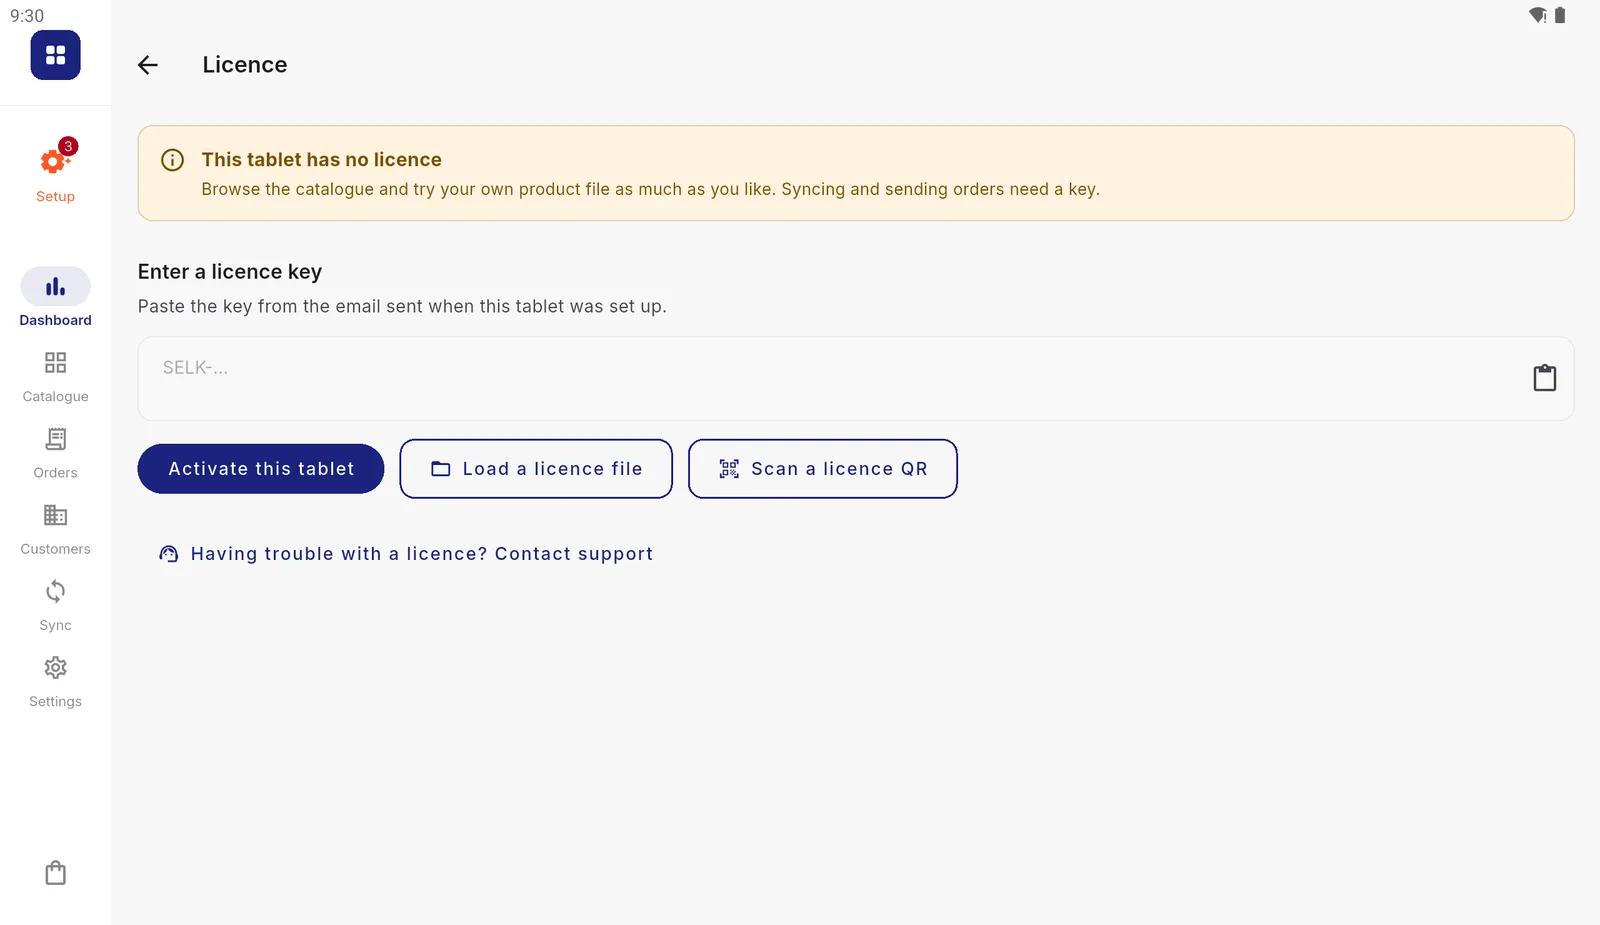
Without a key the tablet can browse the catalogue and try your own files, but cannot sync or send an order. Connect your data
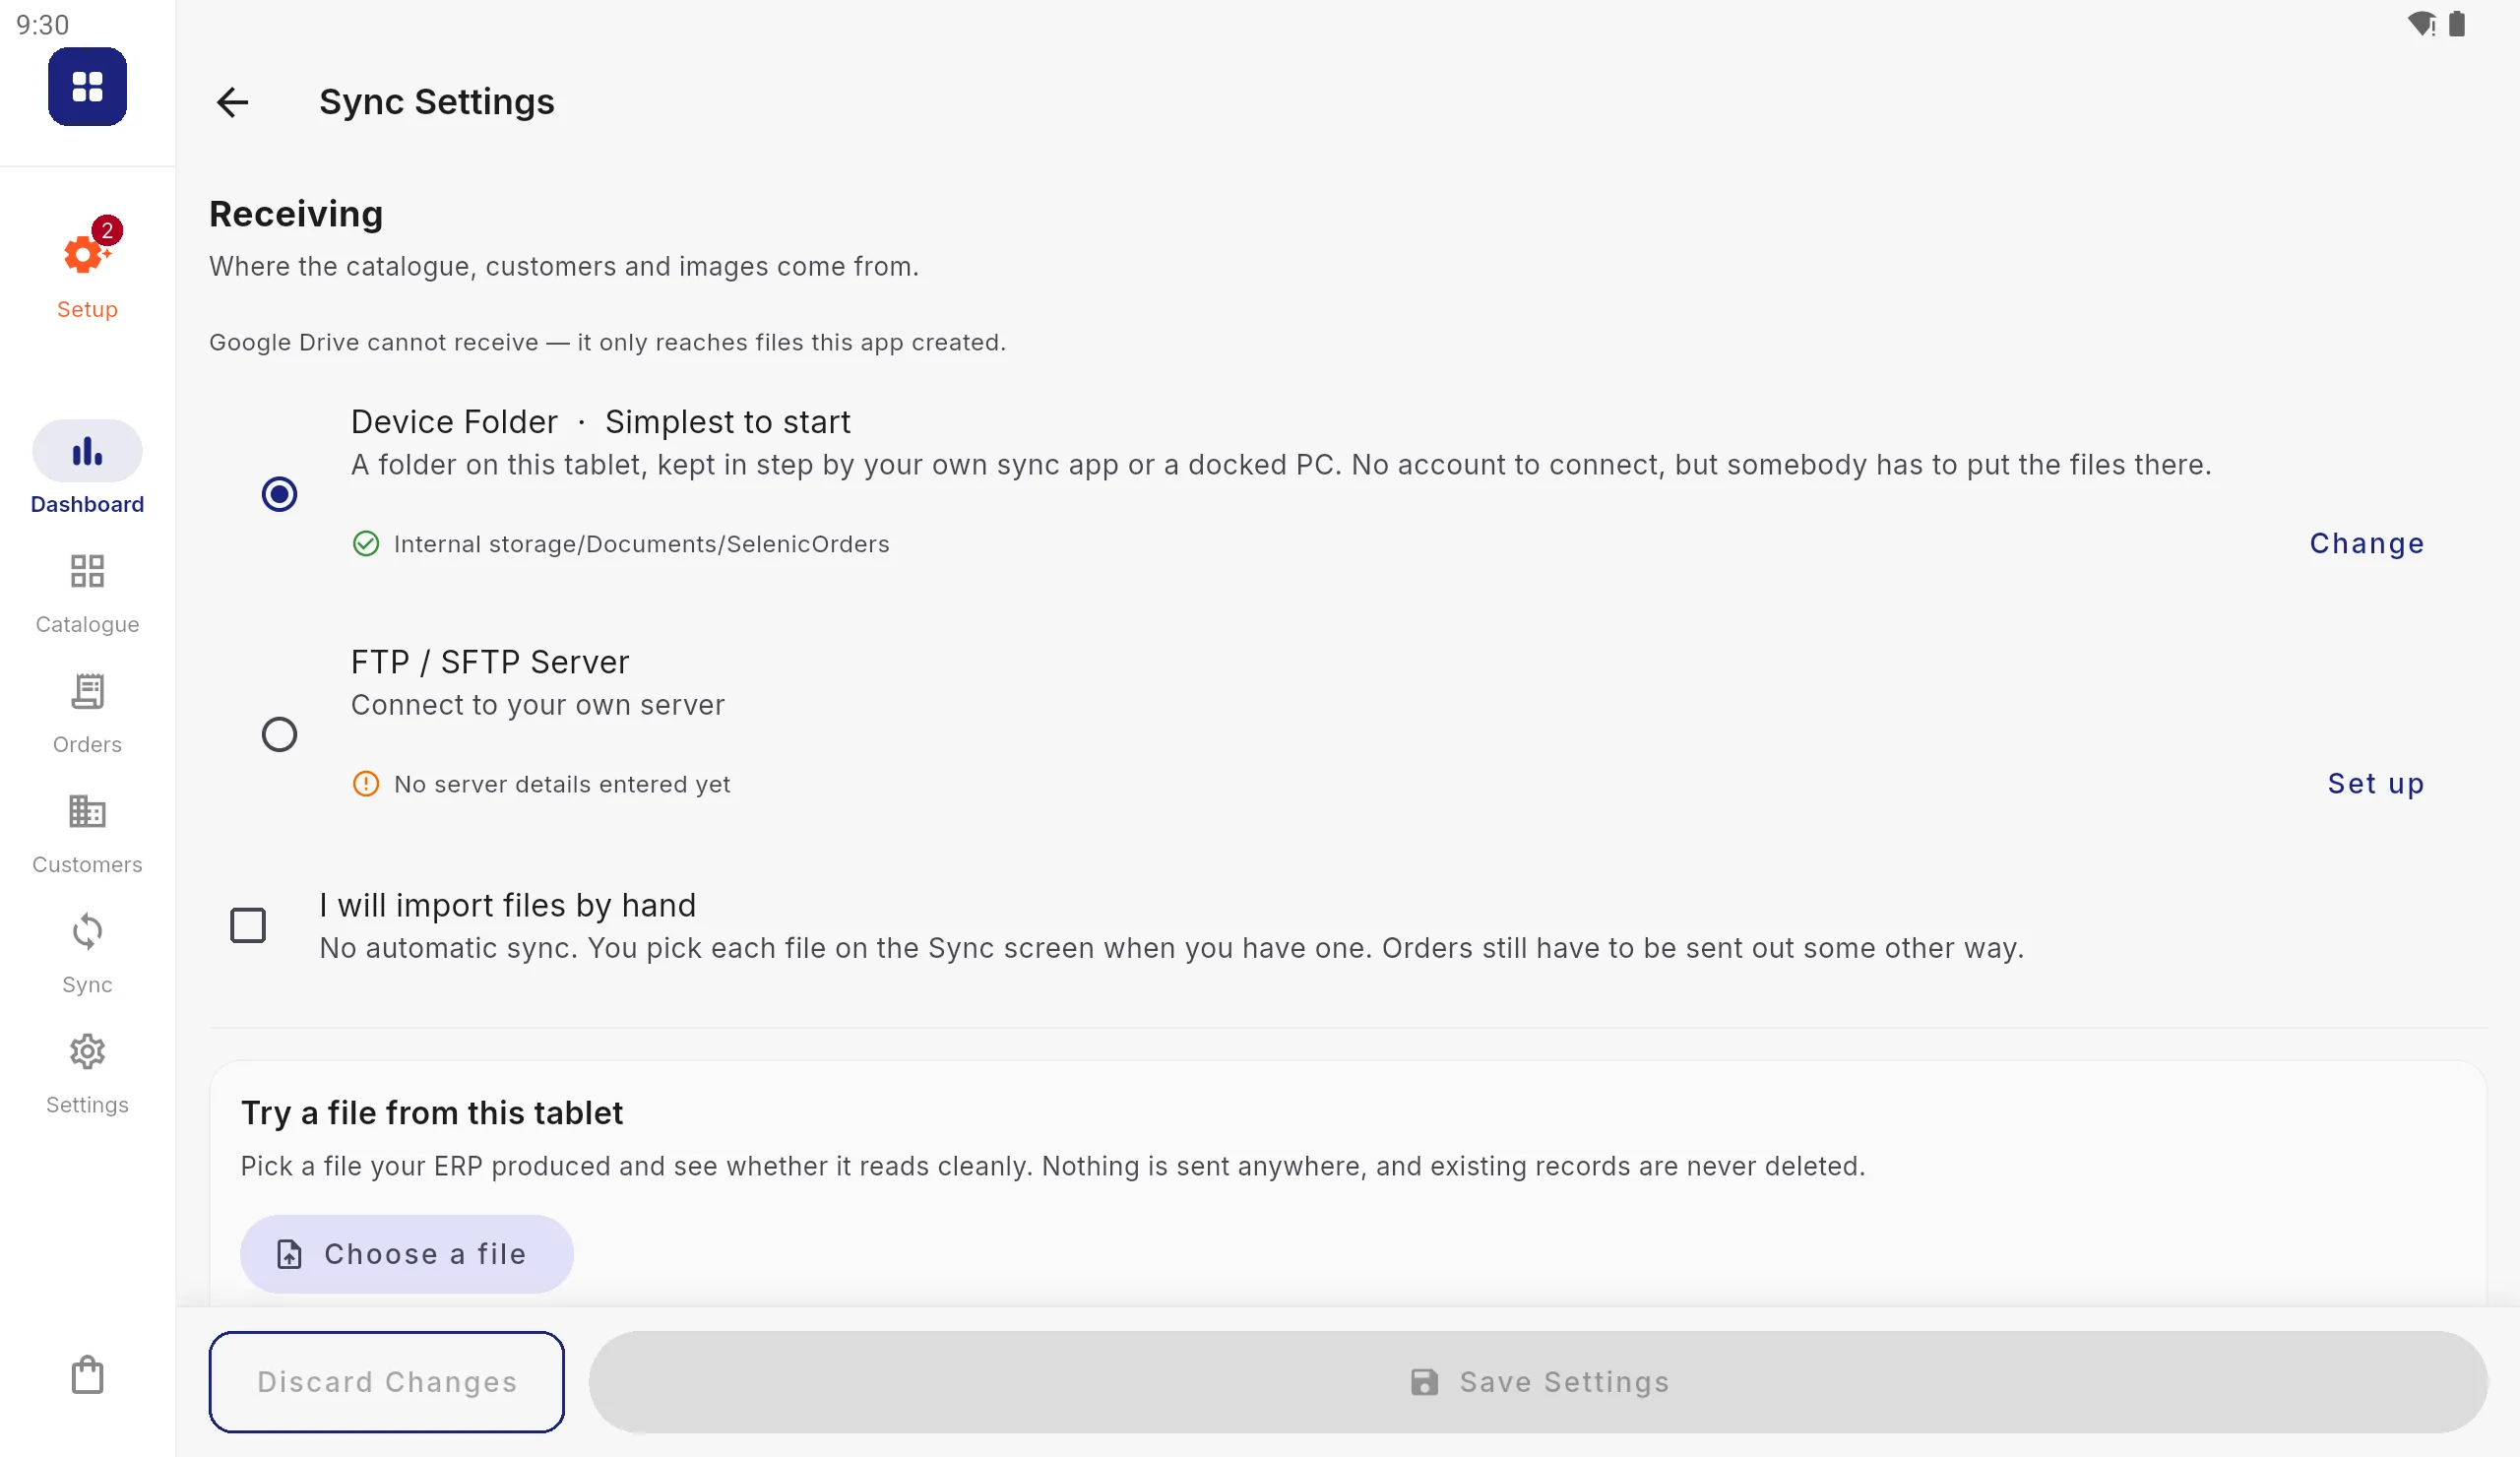
On the checklist tap Where your data comes from and choose where your system leaves its files. For most businesses that is a folder on the tablet: press Set up beside Device Folder, then Choose, pick the folder and press Use this folder and Allow.
Step by step: a folder on the tablet, an FTP or SFTP server. Google Drive can only receive your orders; it cannot supply a catalogue.
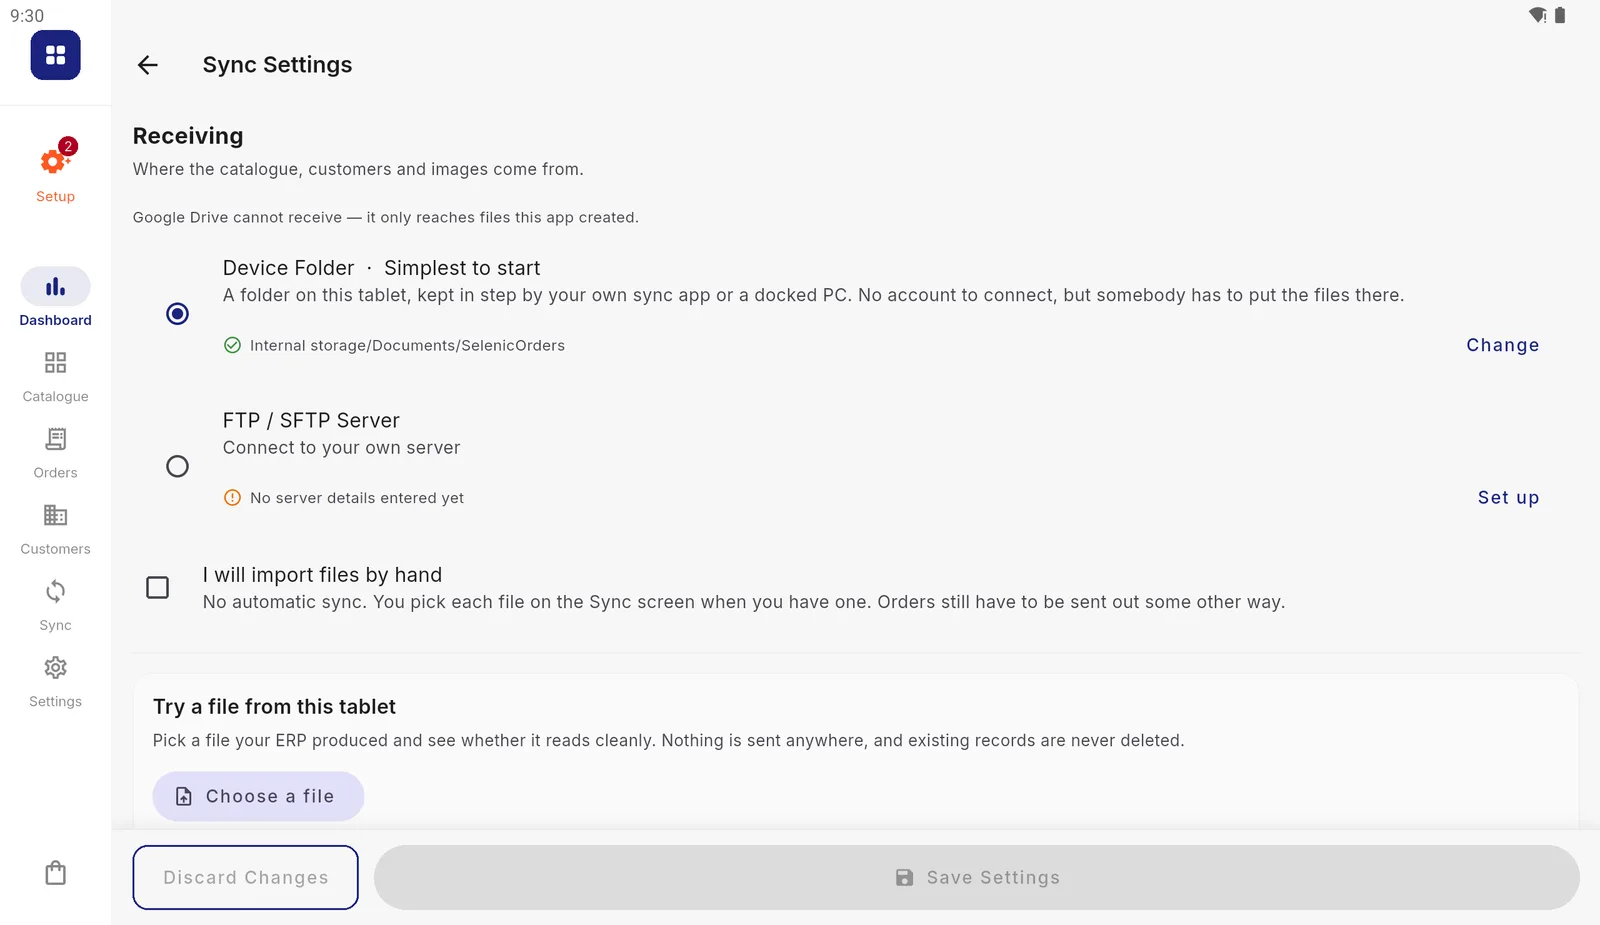
Once a folder is chosen it shows here with a tick. Run the first sync
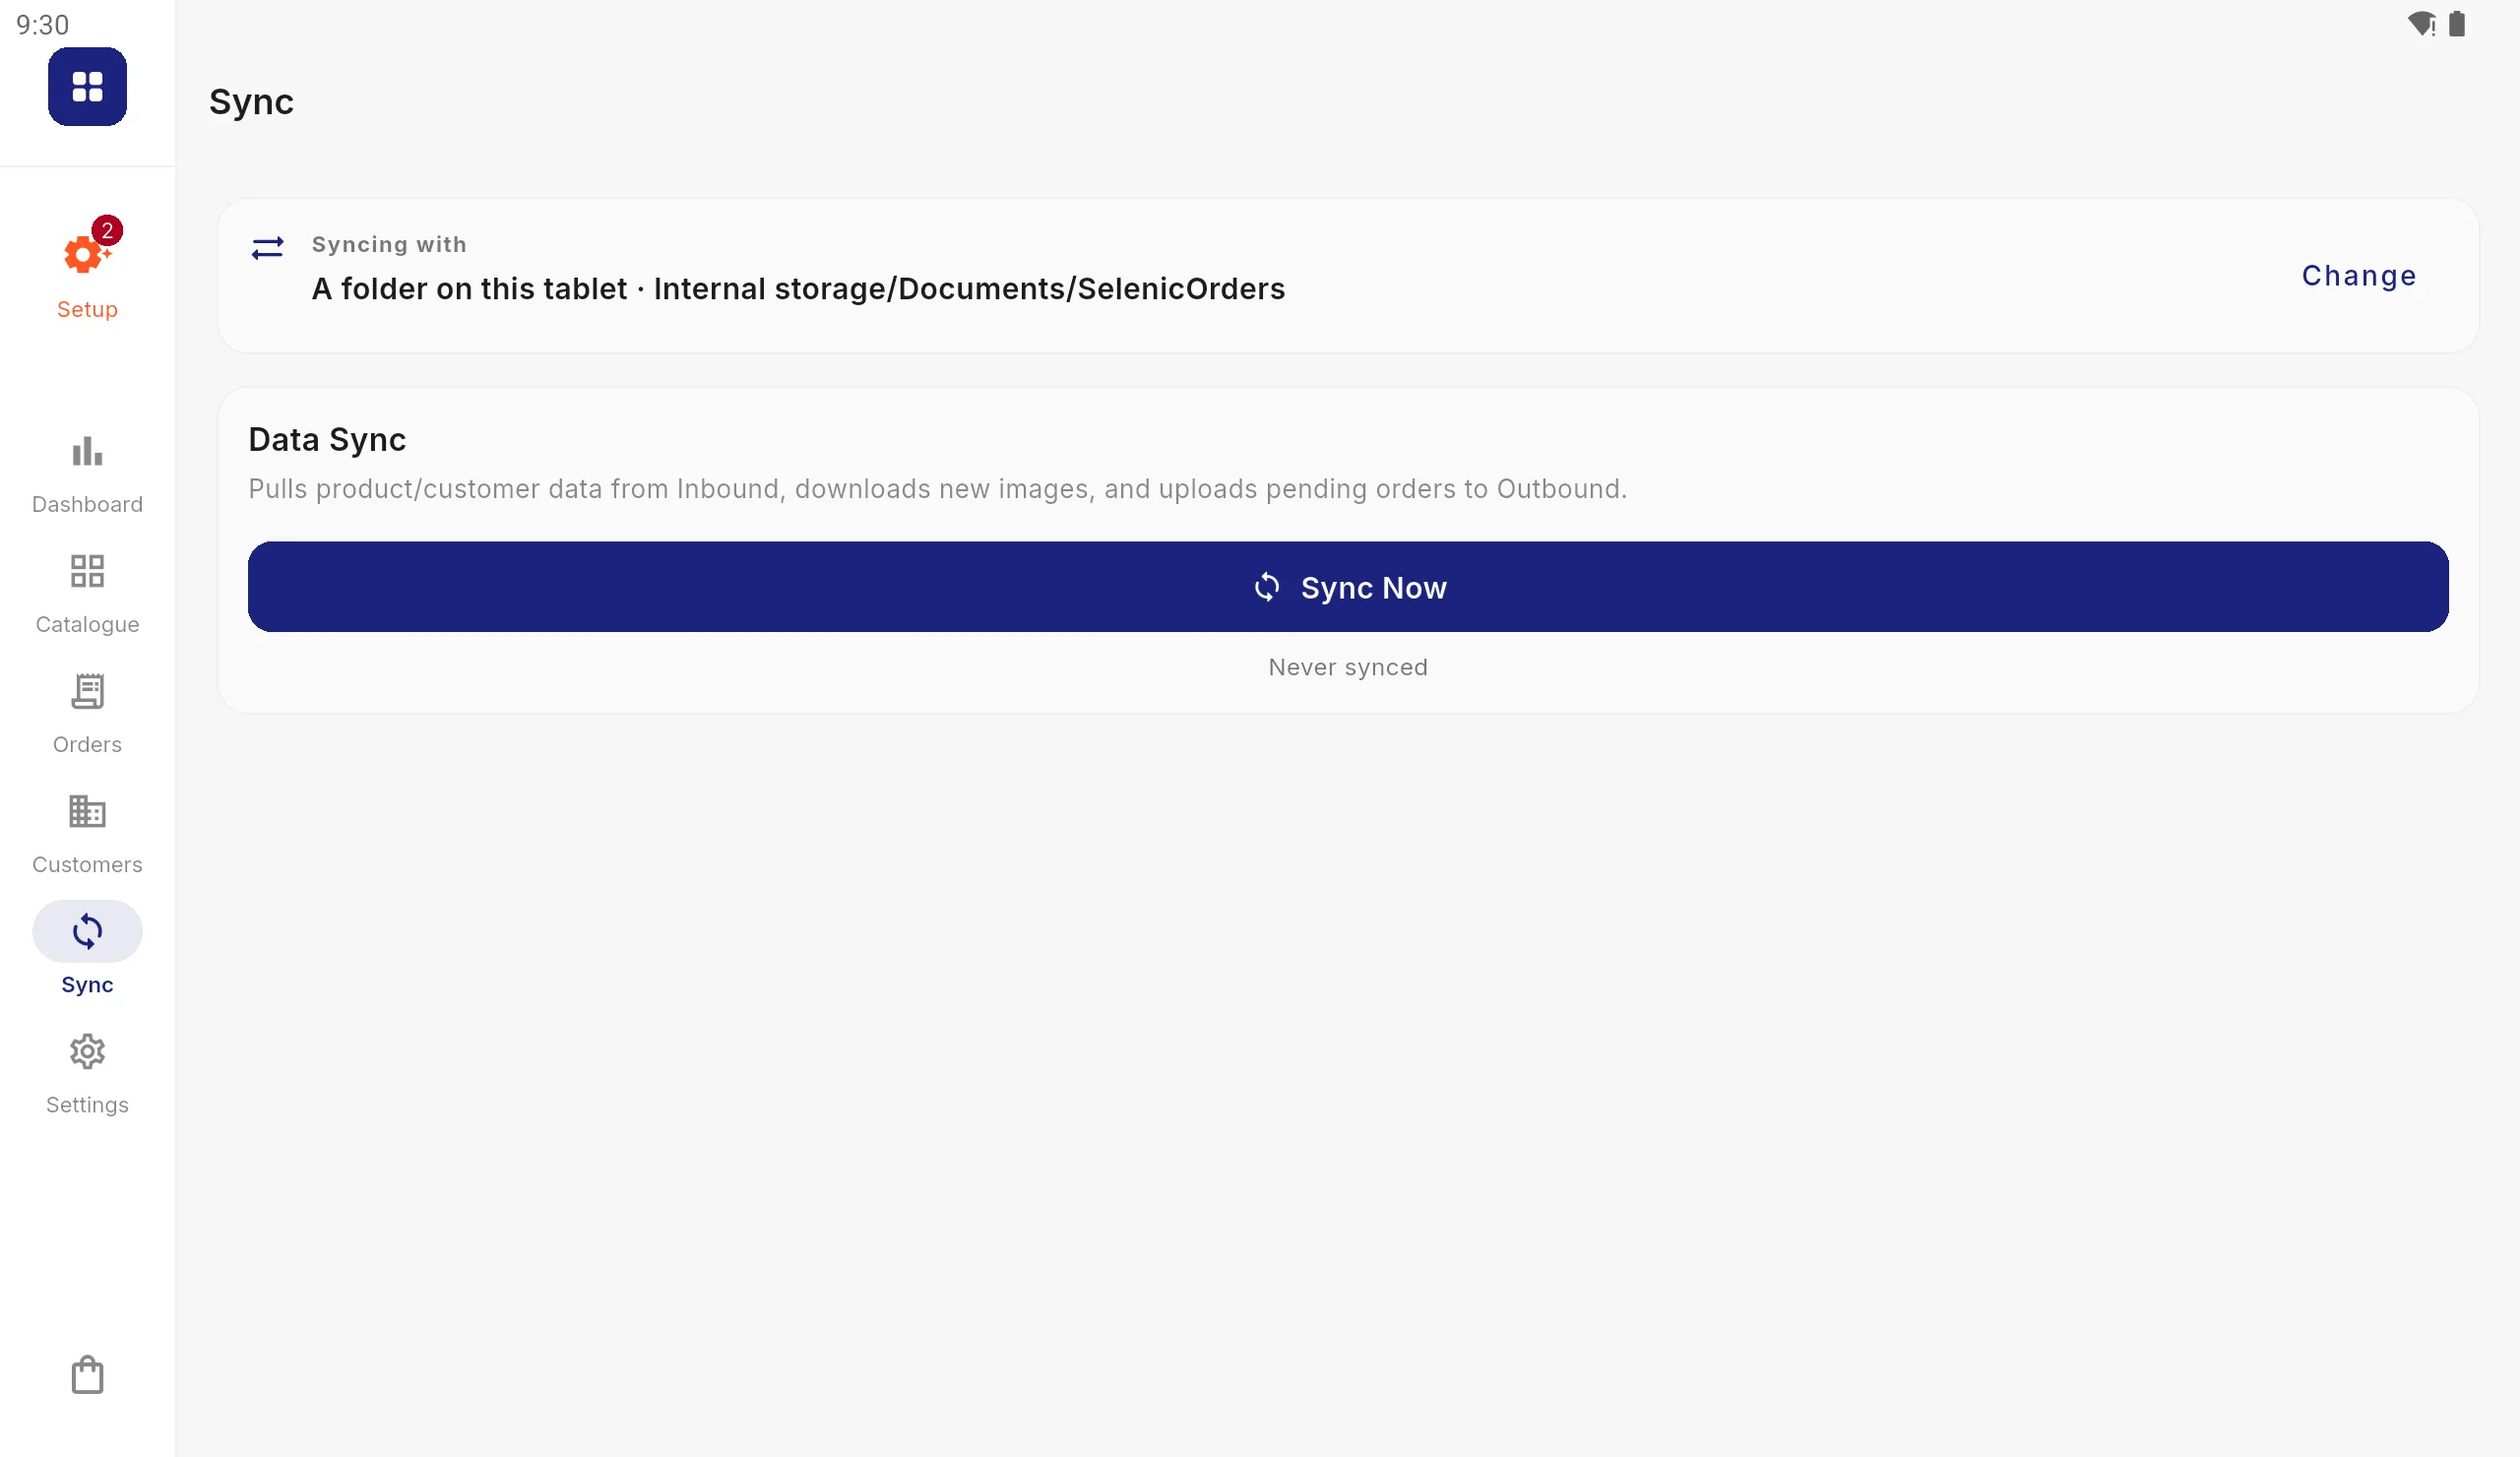
Put your files in the folder (the file formats page has samples to start from), then tap Sync in the sidebar and press Sync Now. The tablet reads your catalogue and customers, and sends any orders waiting to go.
The first sync of a large catalogue with pictures takes a while: about twelve minutes for 5,000 products. Do it on mains power and a good connection.
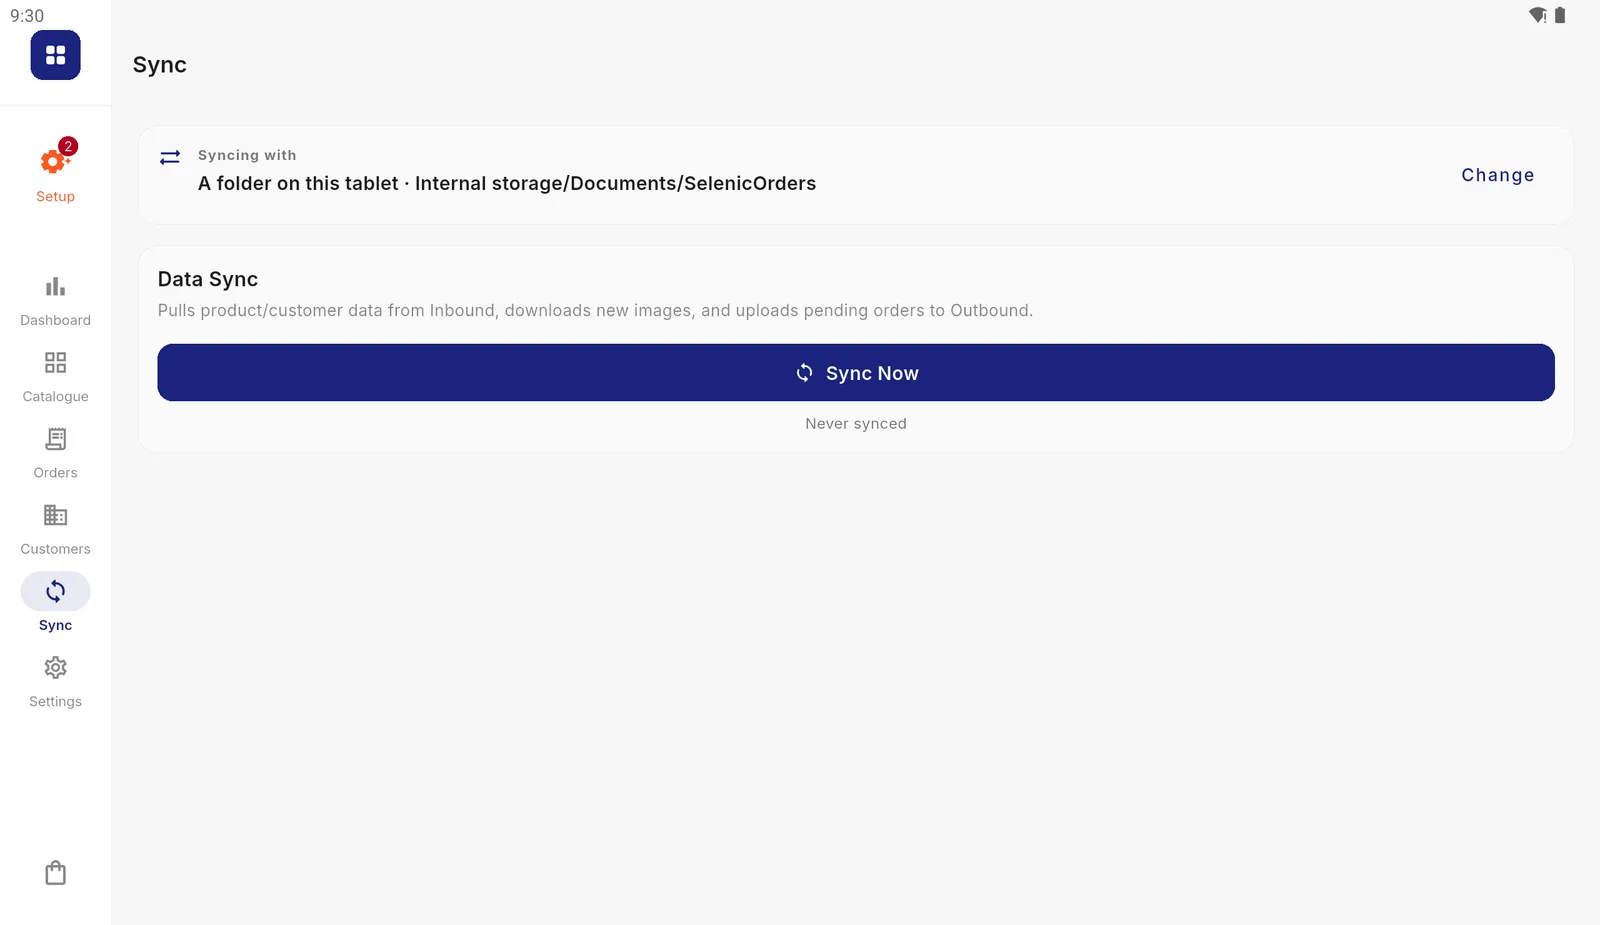
The Sync screen says where this tablet syncs with. Later syncs only read what has changed. Take your first order
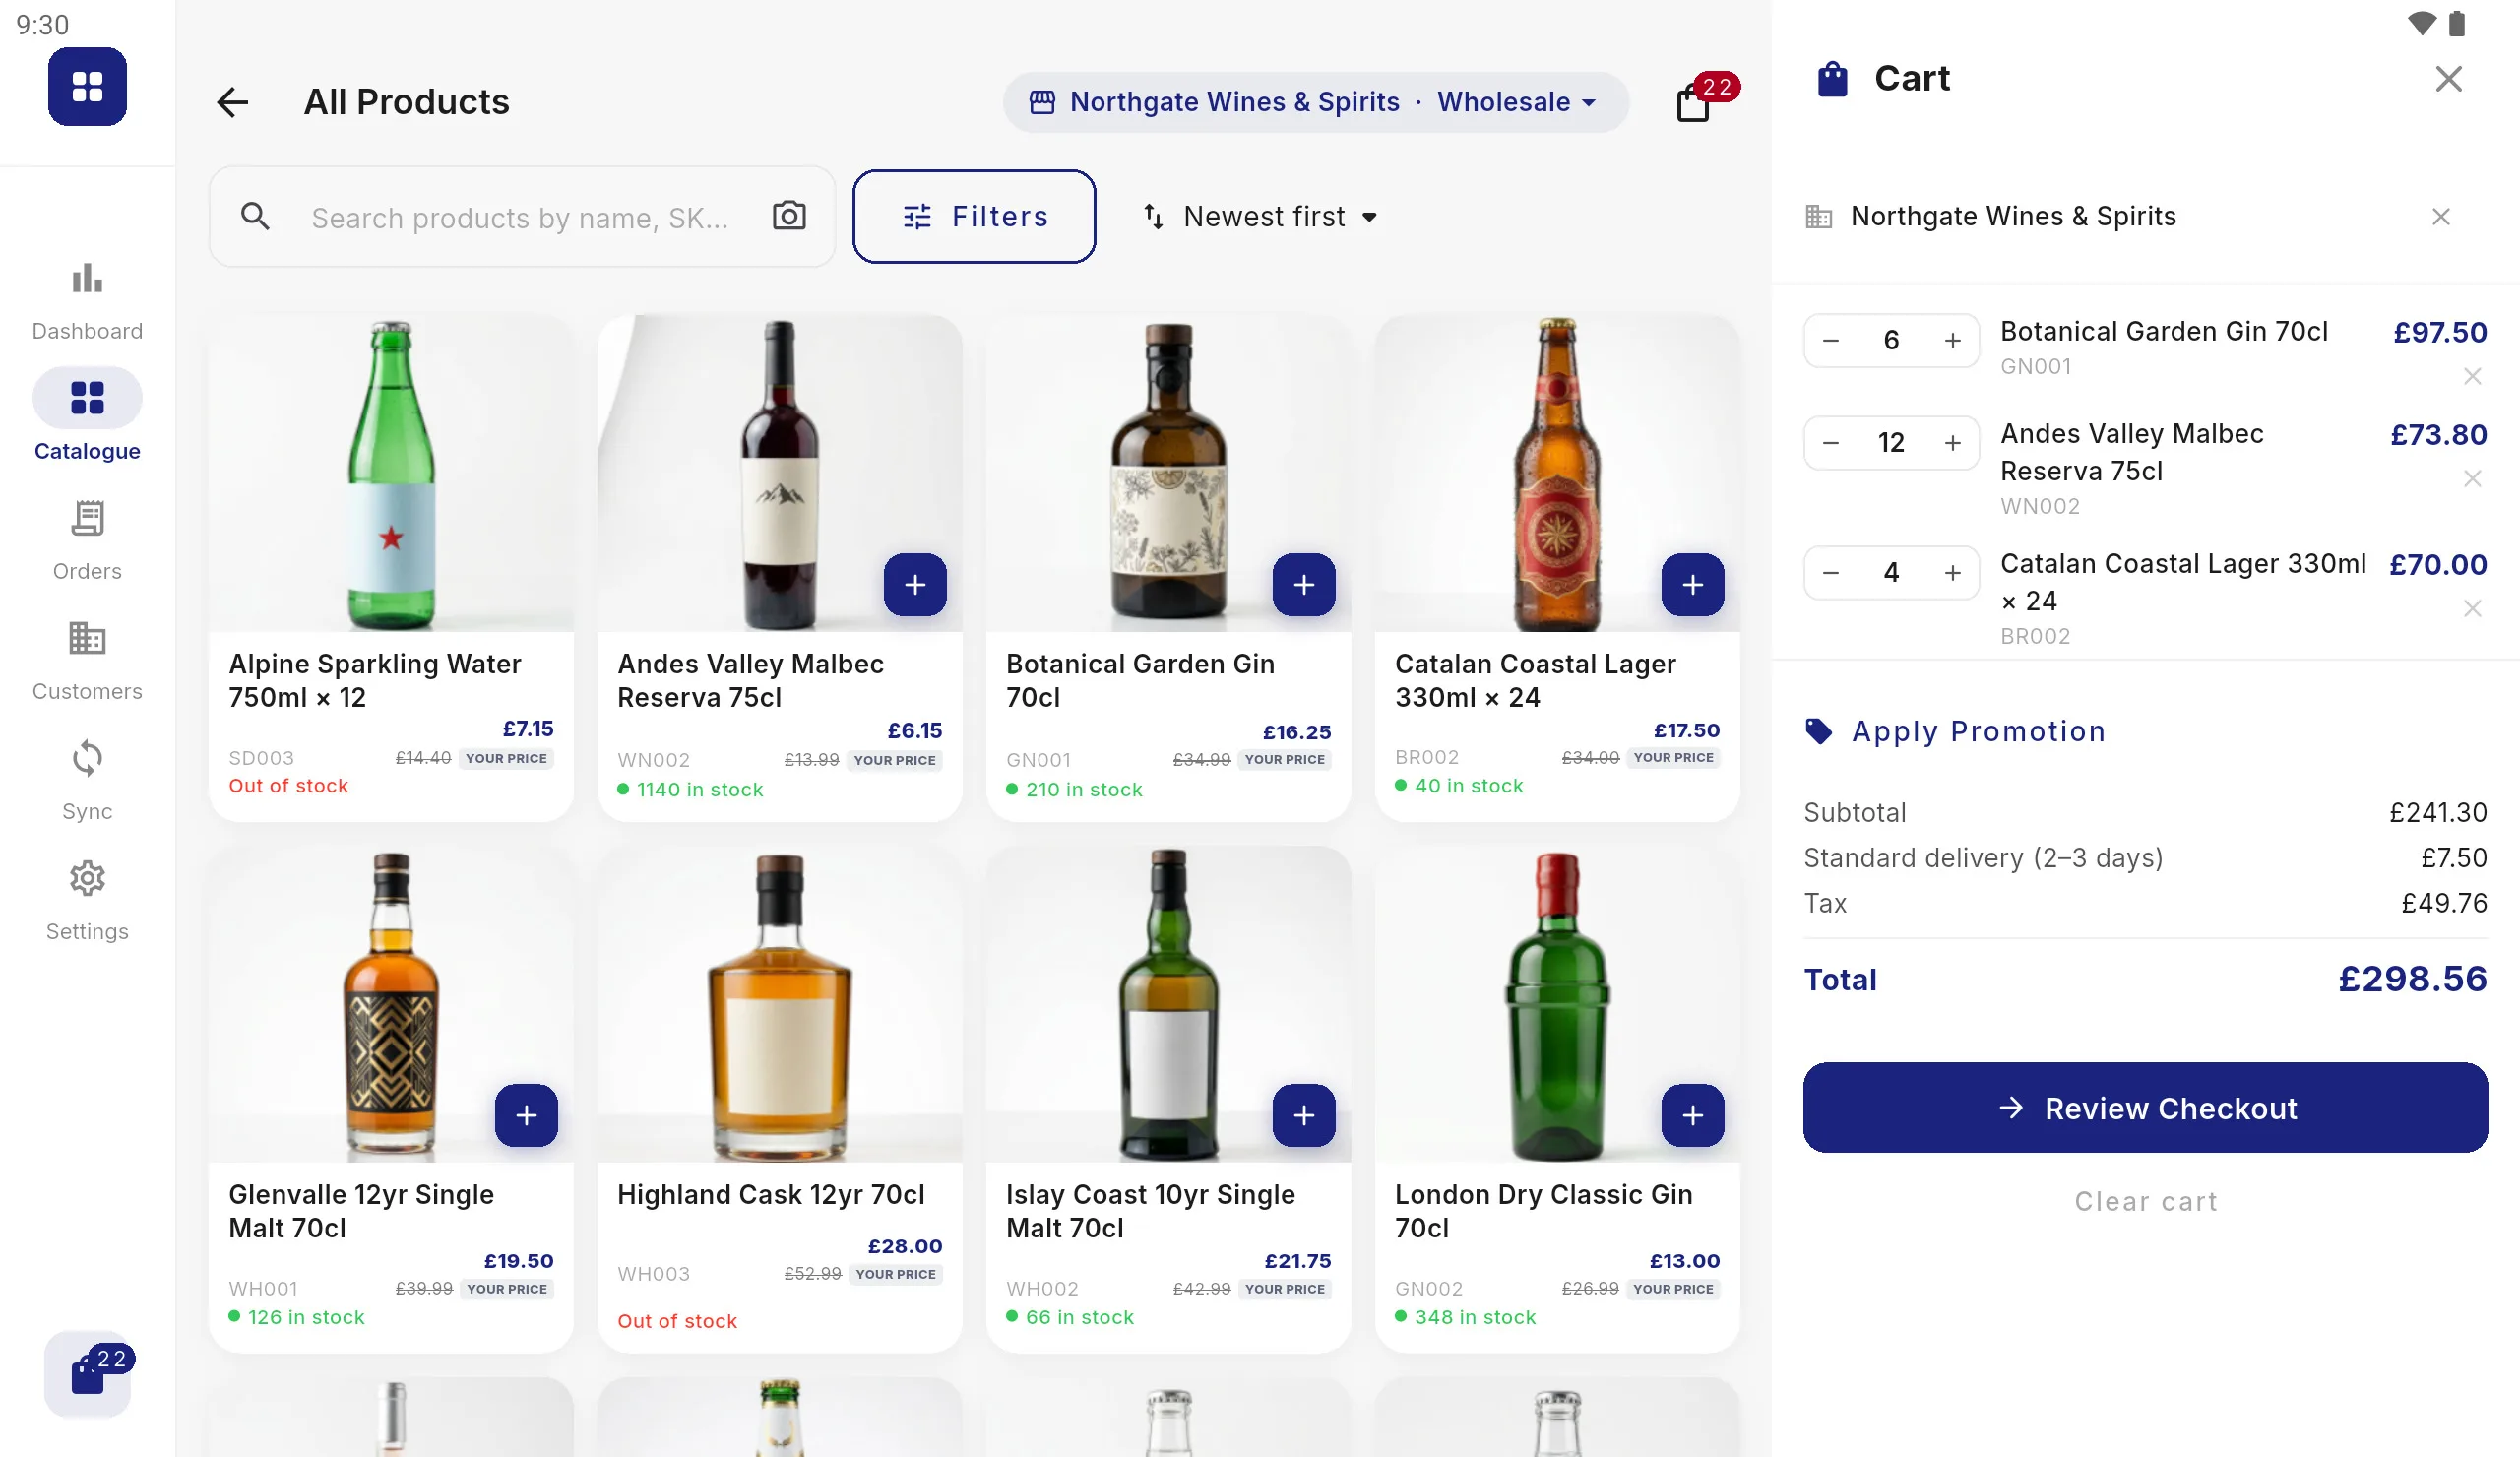
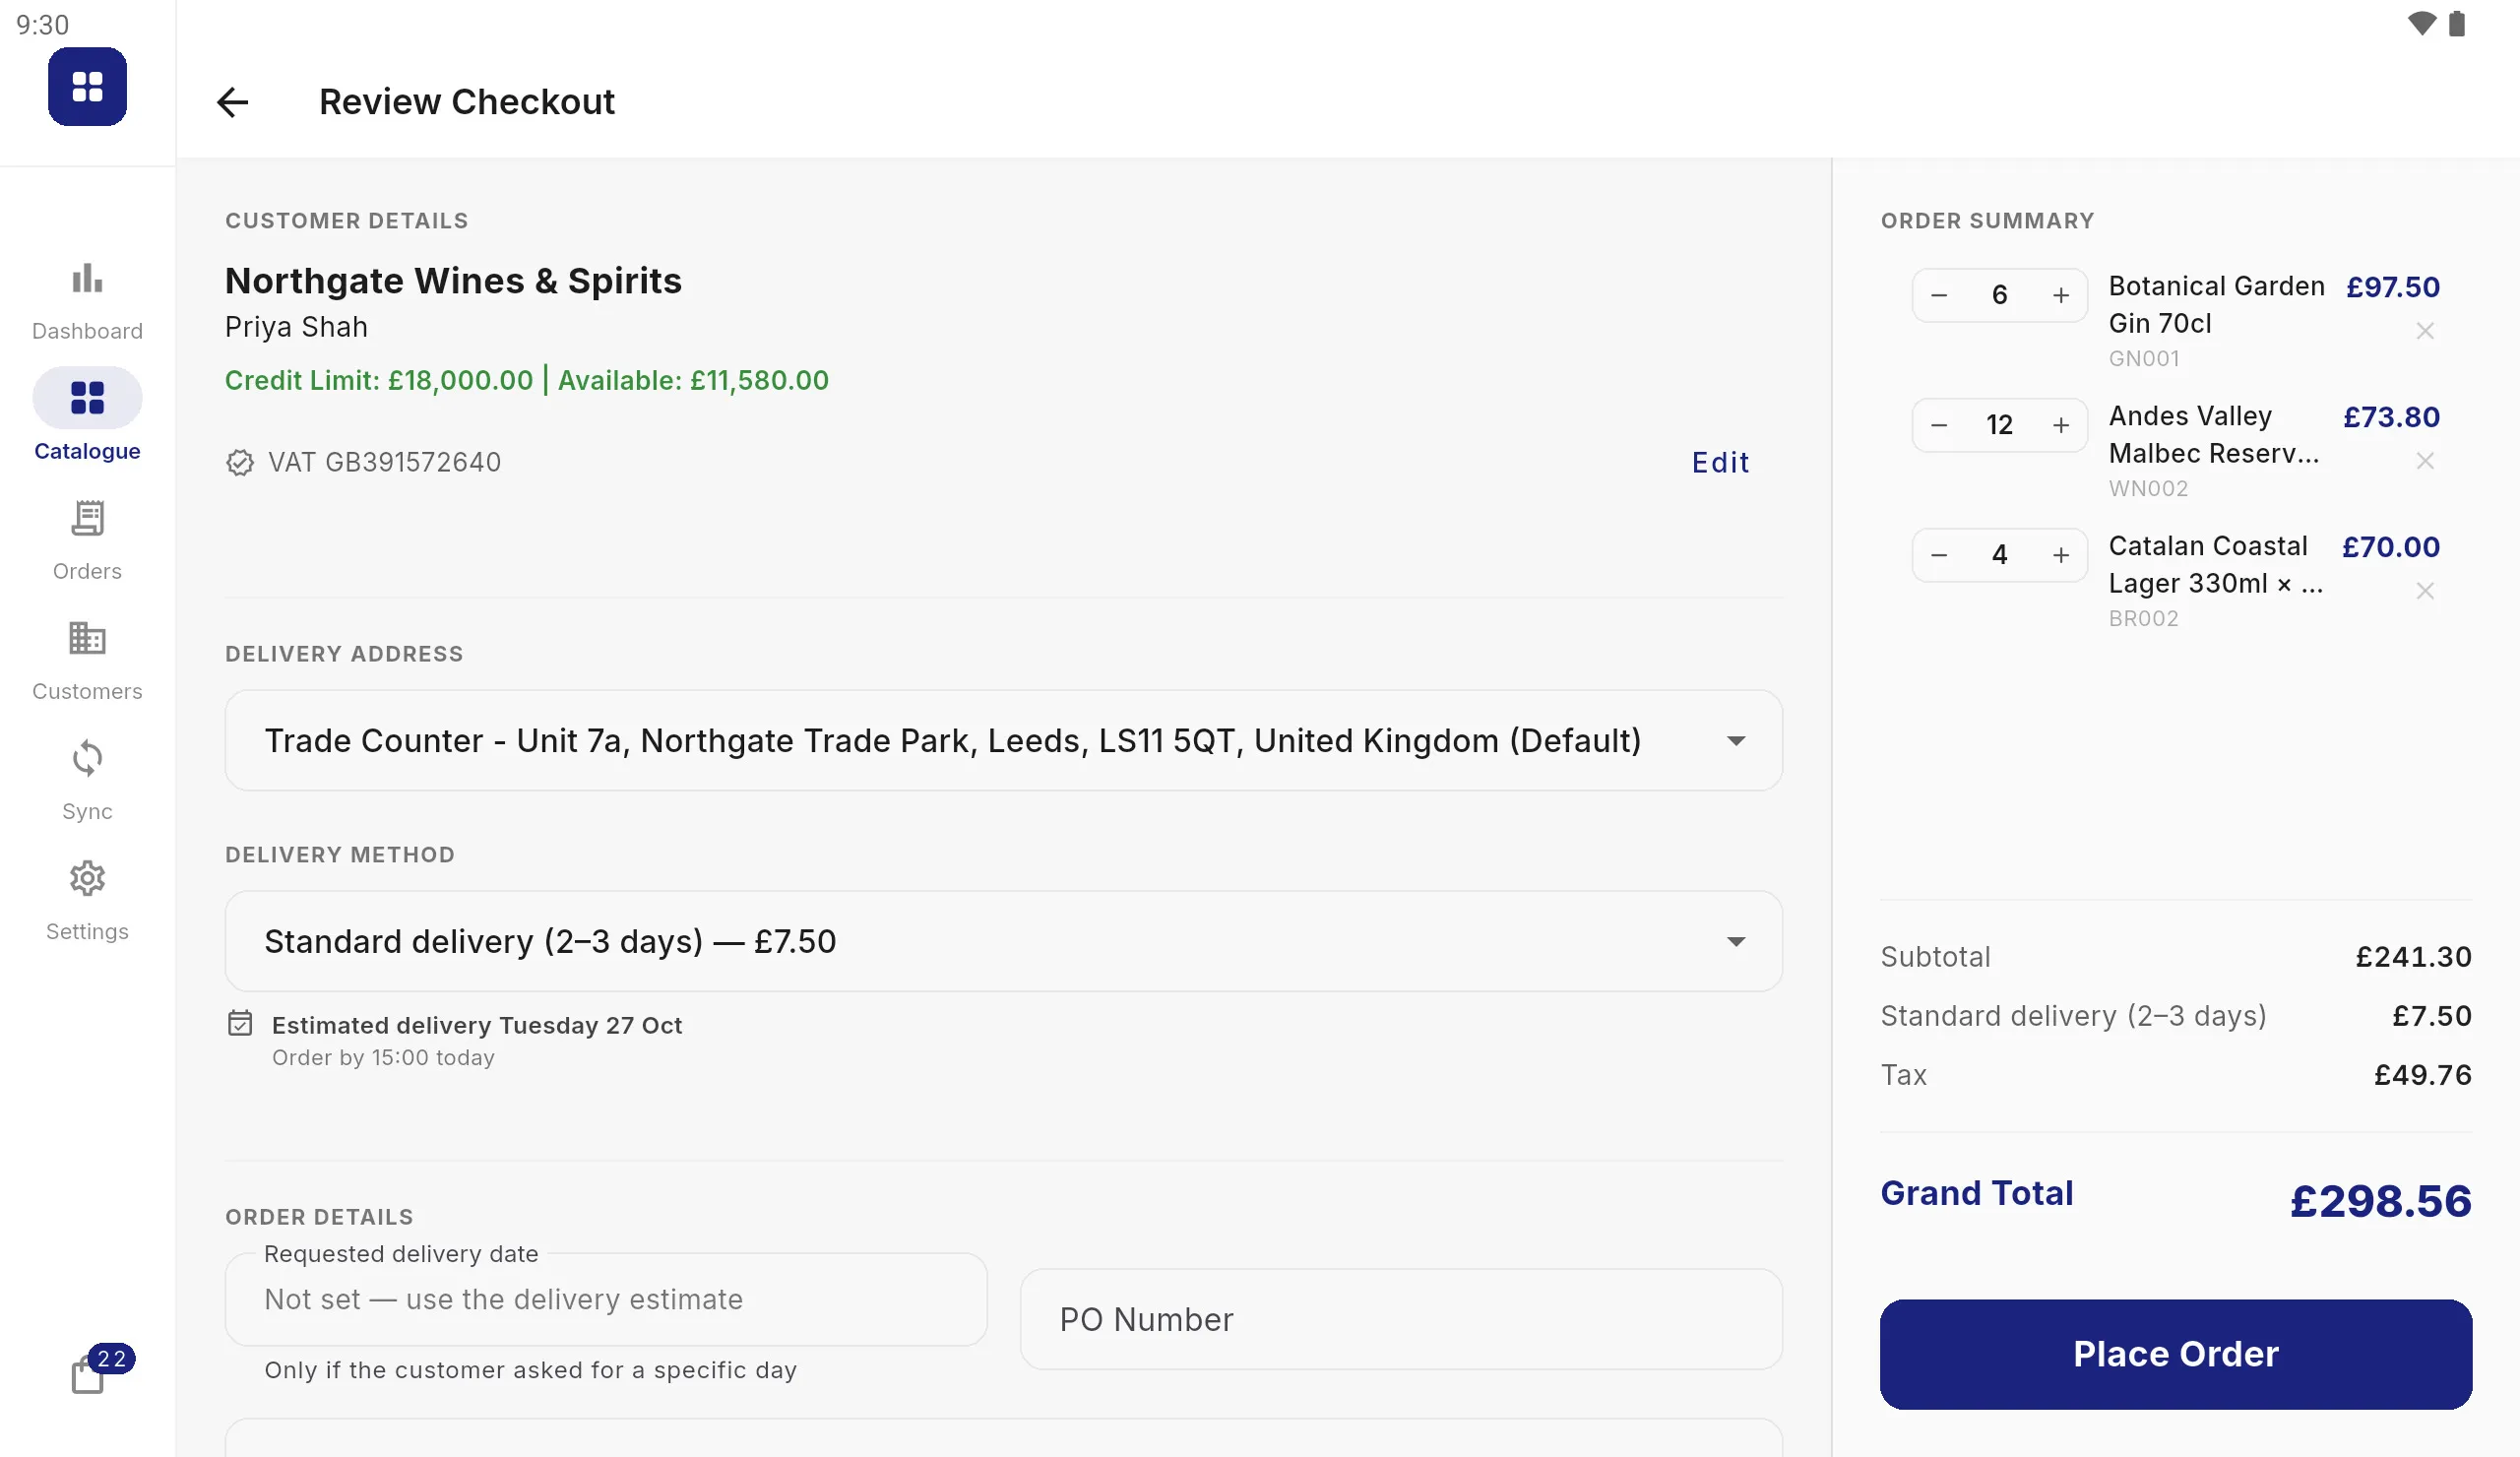
In the Catalogue, use Choose customer at the top so prices show as that customer pays them. Tap + on a product to add it. The cart opens beside the catalogue; press Review Checkout, check the delivery address and method, and press Place Order.
The order is saved on the tablet at once and goes to your system at the next sync.
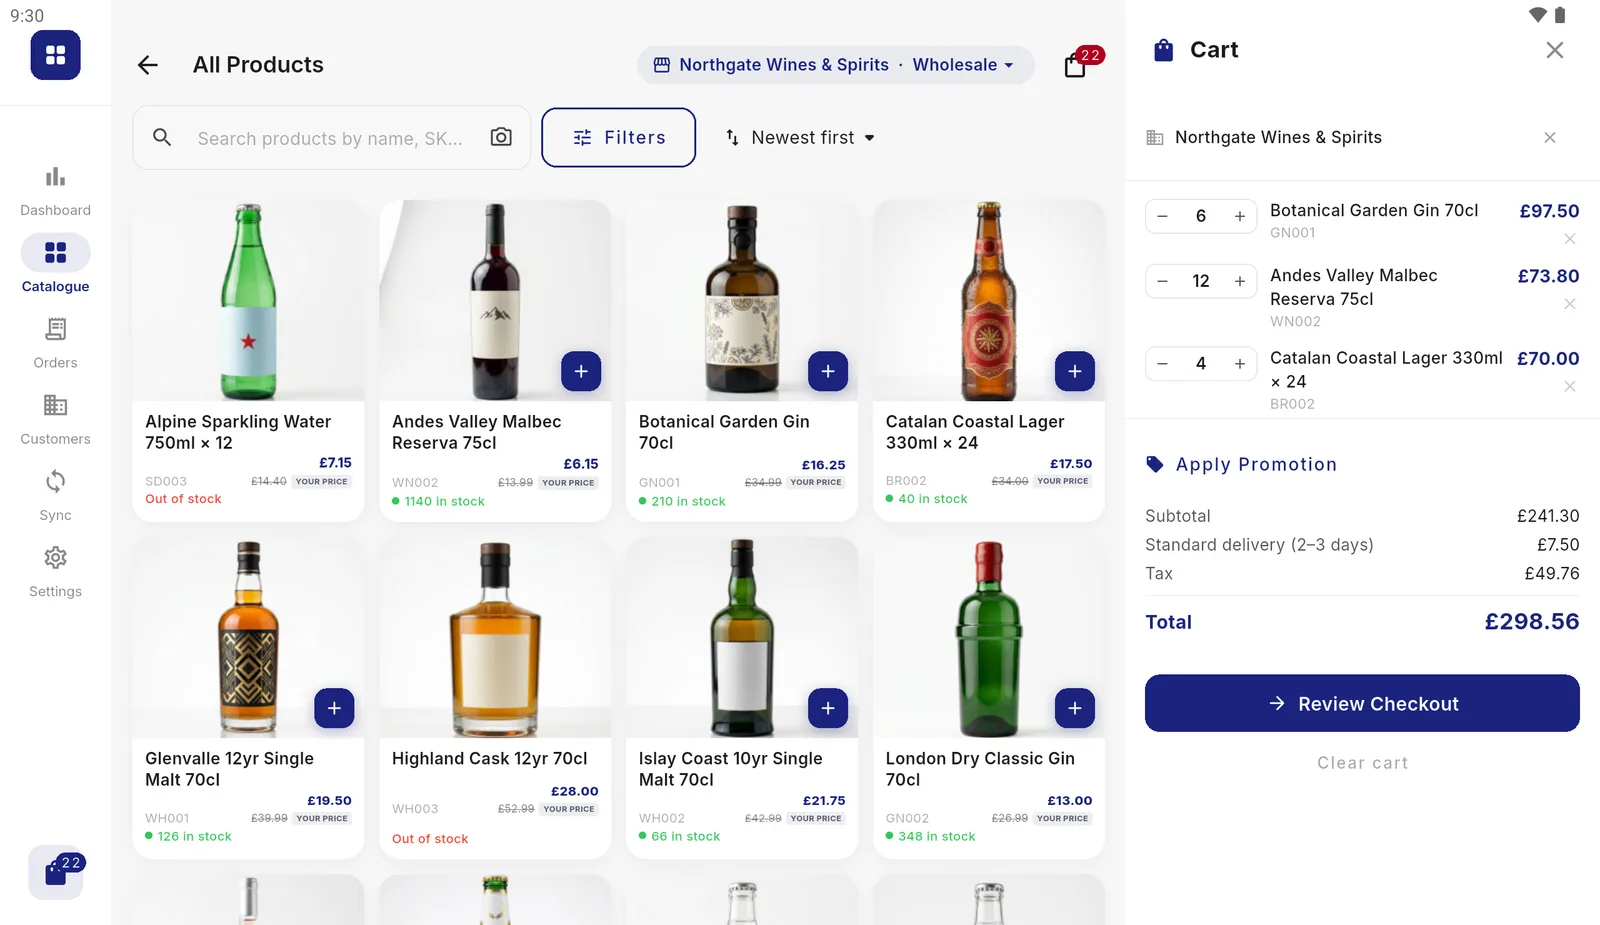
The cart sits beside the catalogue while you add to it. 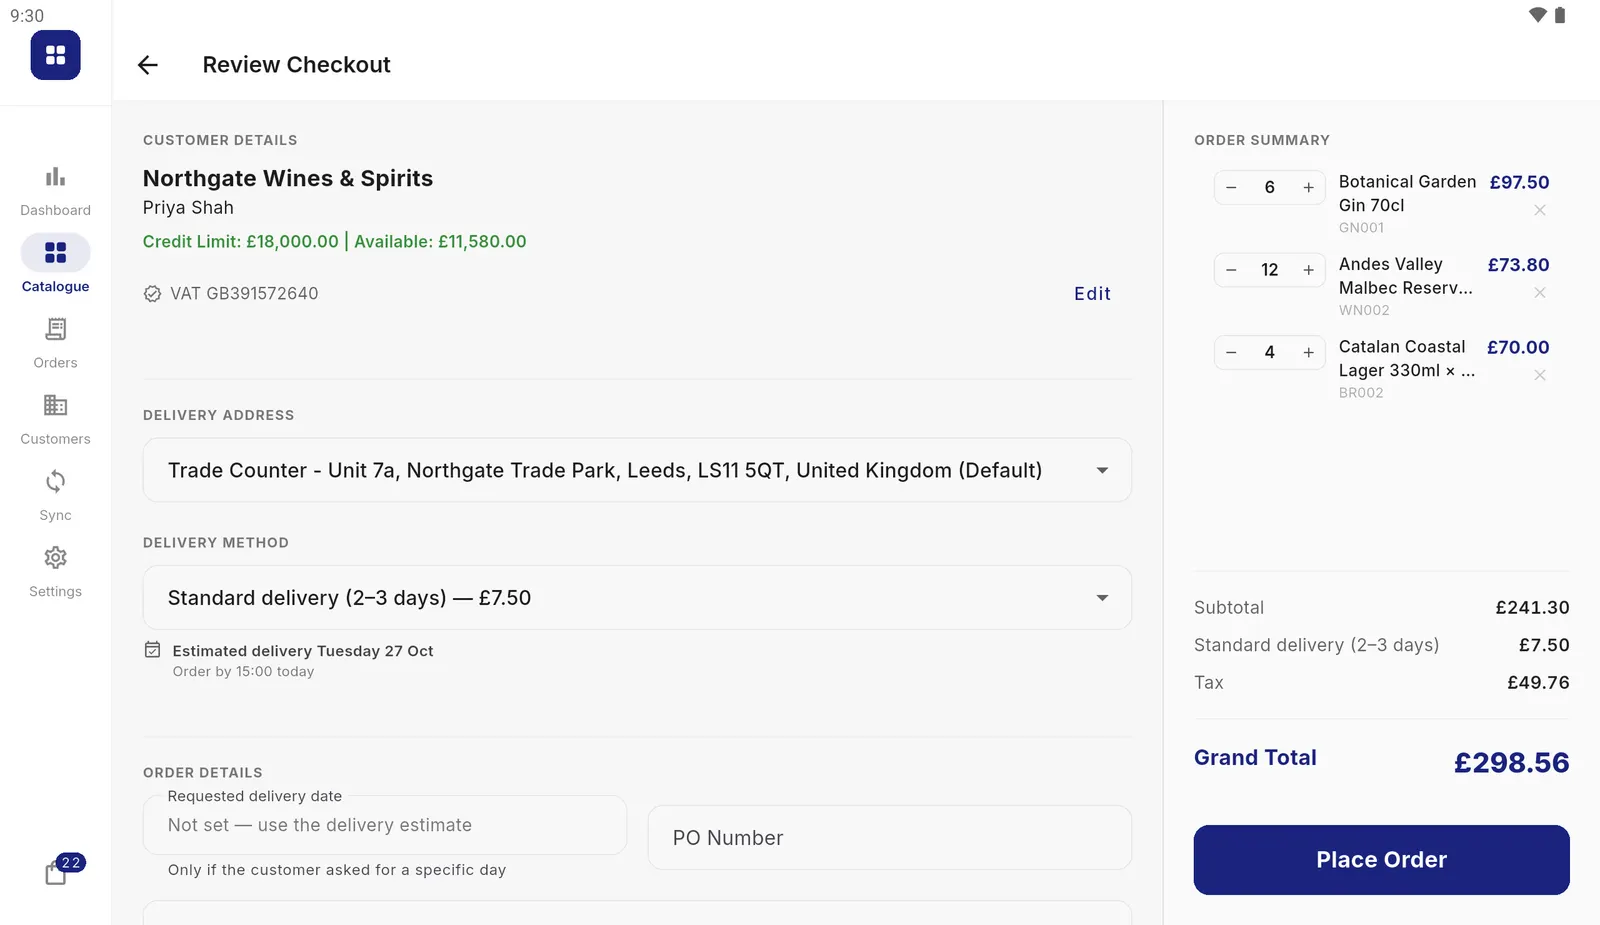
Checkout shows the customer's credit, where it is going, when it will arrive and the totals.
That is a working tablet. The rest of this page covers each part properly.
1. What you need before you start
- An Android tablet. The app is built for tablets; a phone will run it but the layout is designed for the larger screen.
- Somewhere for your system to put its files: a folder on the tablet (kept in step by a sync app such as OneDrive or Dropbox, or copied from a PC), or an FTP or SFTP server.
- Roughly 300 MB free for a 5,000-product catalogue with images, plus room to grow.
- An internet connection once, to activate the licence. After that the tablet works without one and catches up whenever it syncs.
2. The setup checklist
Set this up for my business opens a checklist. It stays in the sidebar under Setup until the essentials are done, and the steps can be done in any order. The number on the Setup icon is how many required steps are left.
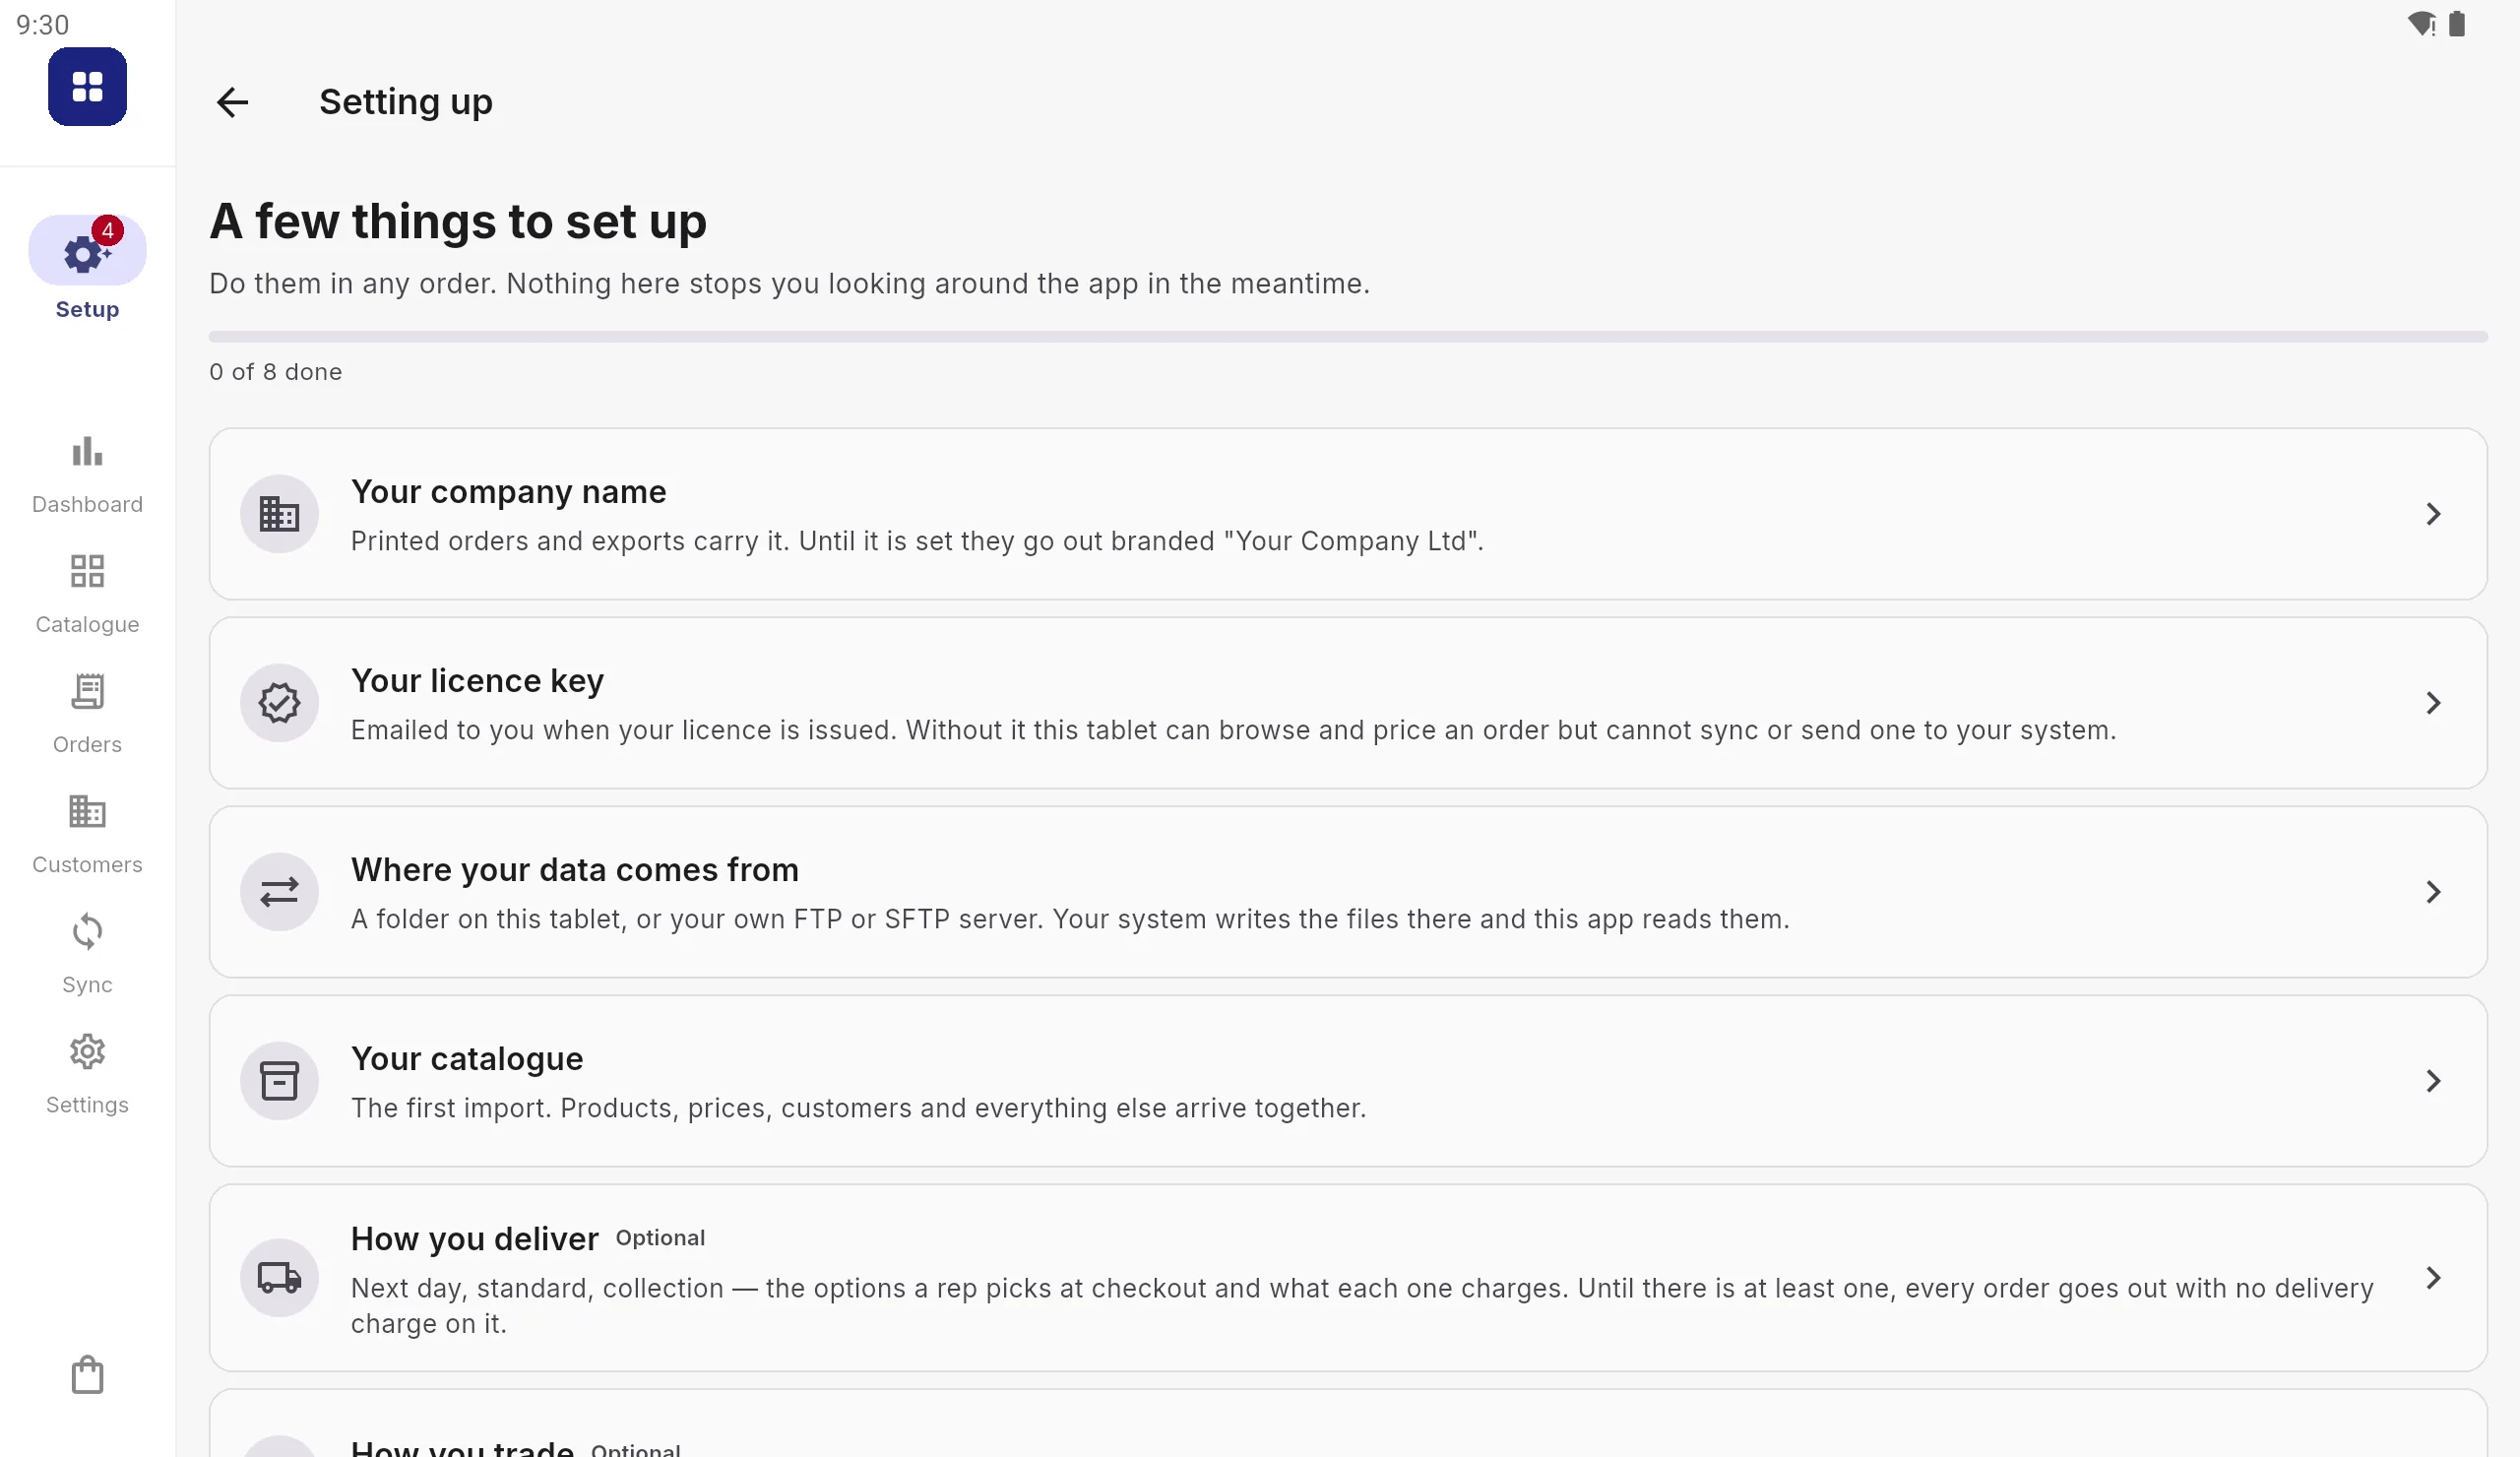
- Your company name. Printed orders and exports carry it.
- Your licence key. See the Quick Start above. You can also reach it any time from Settings › Licence.
- Where your data comes from. A folder on the tablet or your own FTP or SFTP server; see section 3. If you will only ever import by hand, choose I will import files by hand on the same page.
- Your catalogue. Ticks itself after the first import, or once the first product is added by hand.
- How you deliver (optional). The delivery options a rep picks at checkout and what each charges. Until there is one, orders carry no delivery charge.
- How you trade (optional). Backorders, credit limits, delivery charges and your tax rate.
- An admin PIN. Optional while the tablet is empty, required once real customer data has arrived on it.
- Your team (optional). One sign-in each, so every order carries the name of the rep who took it.
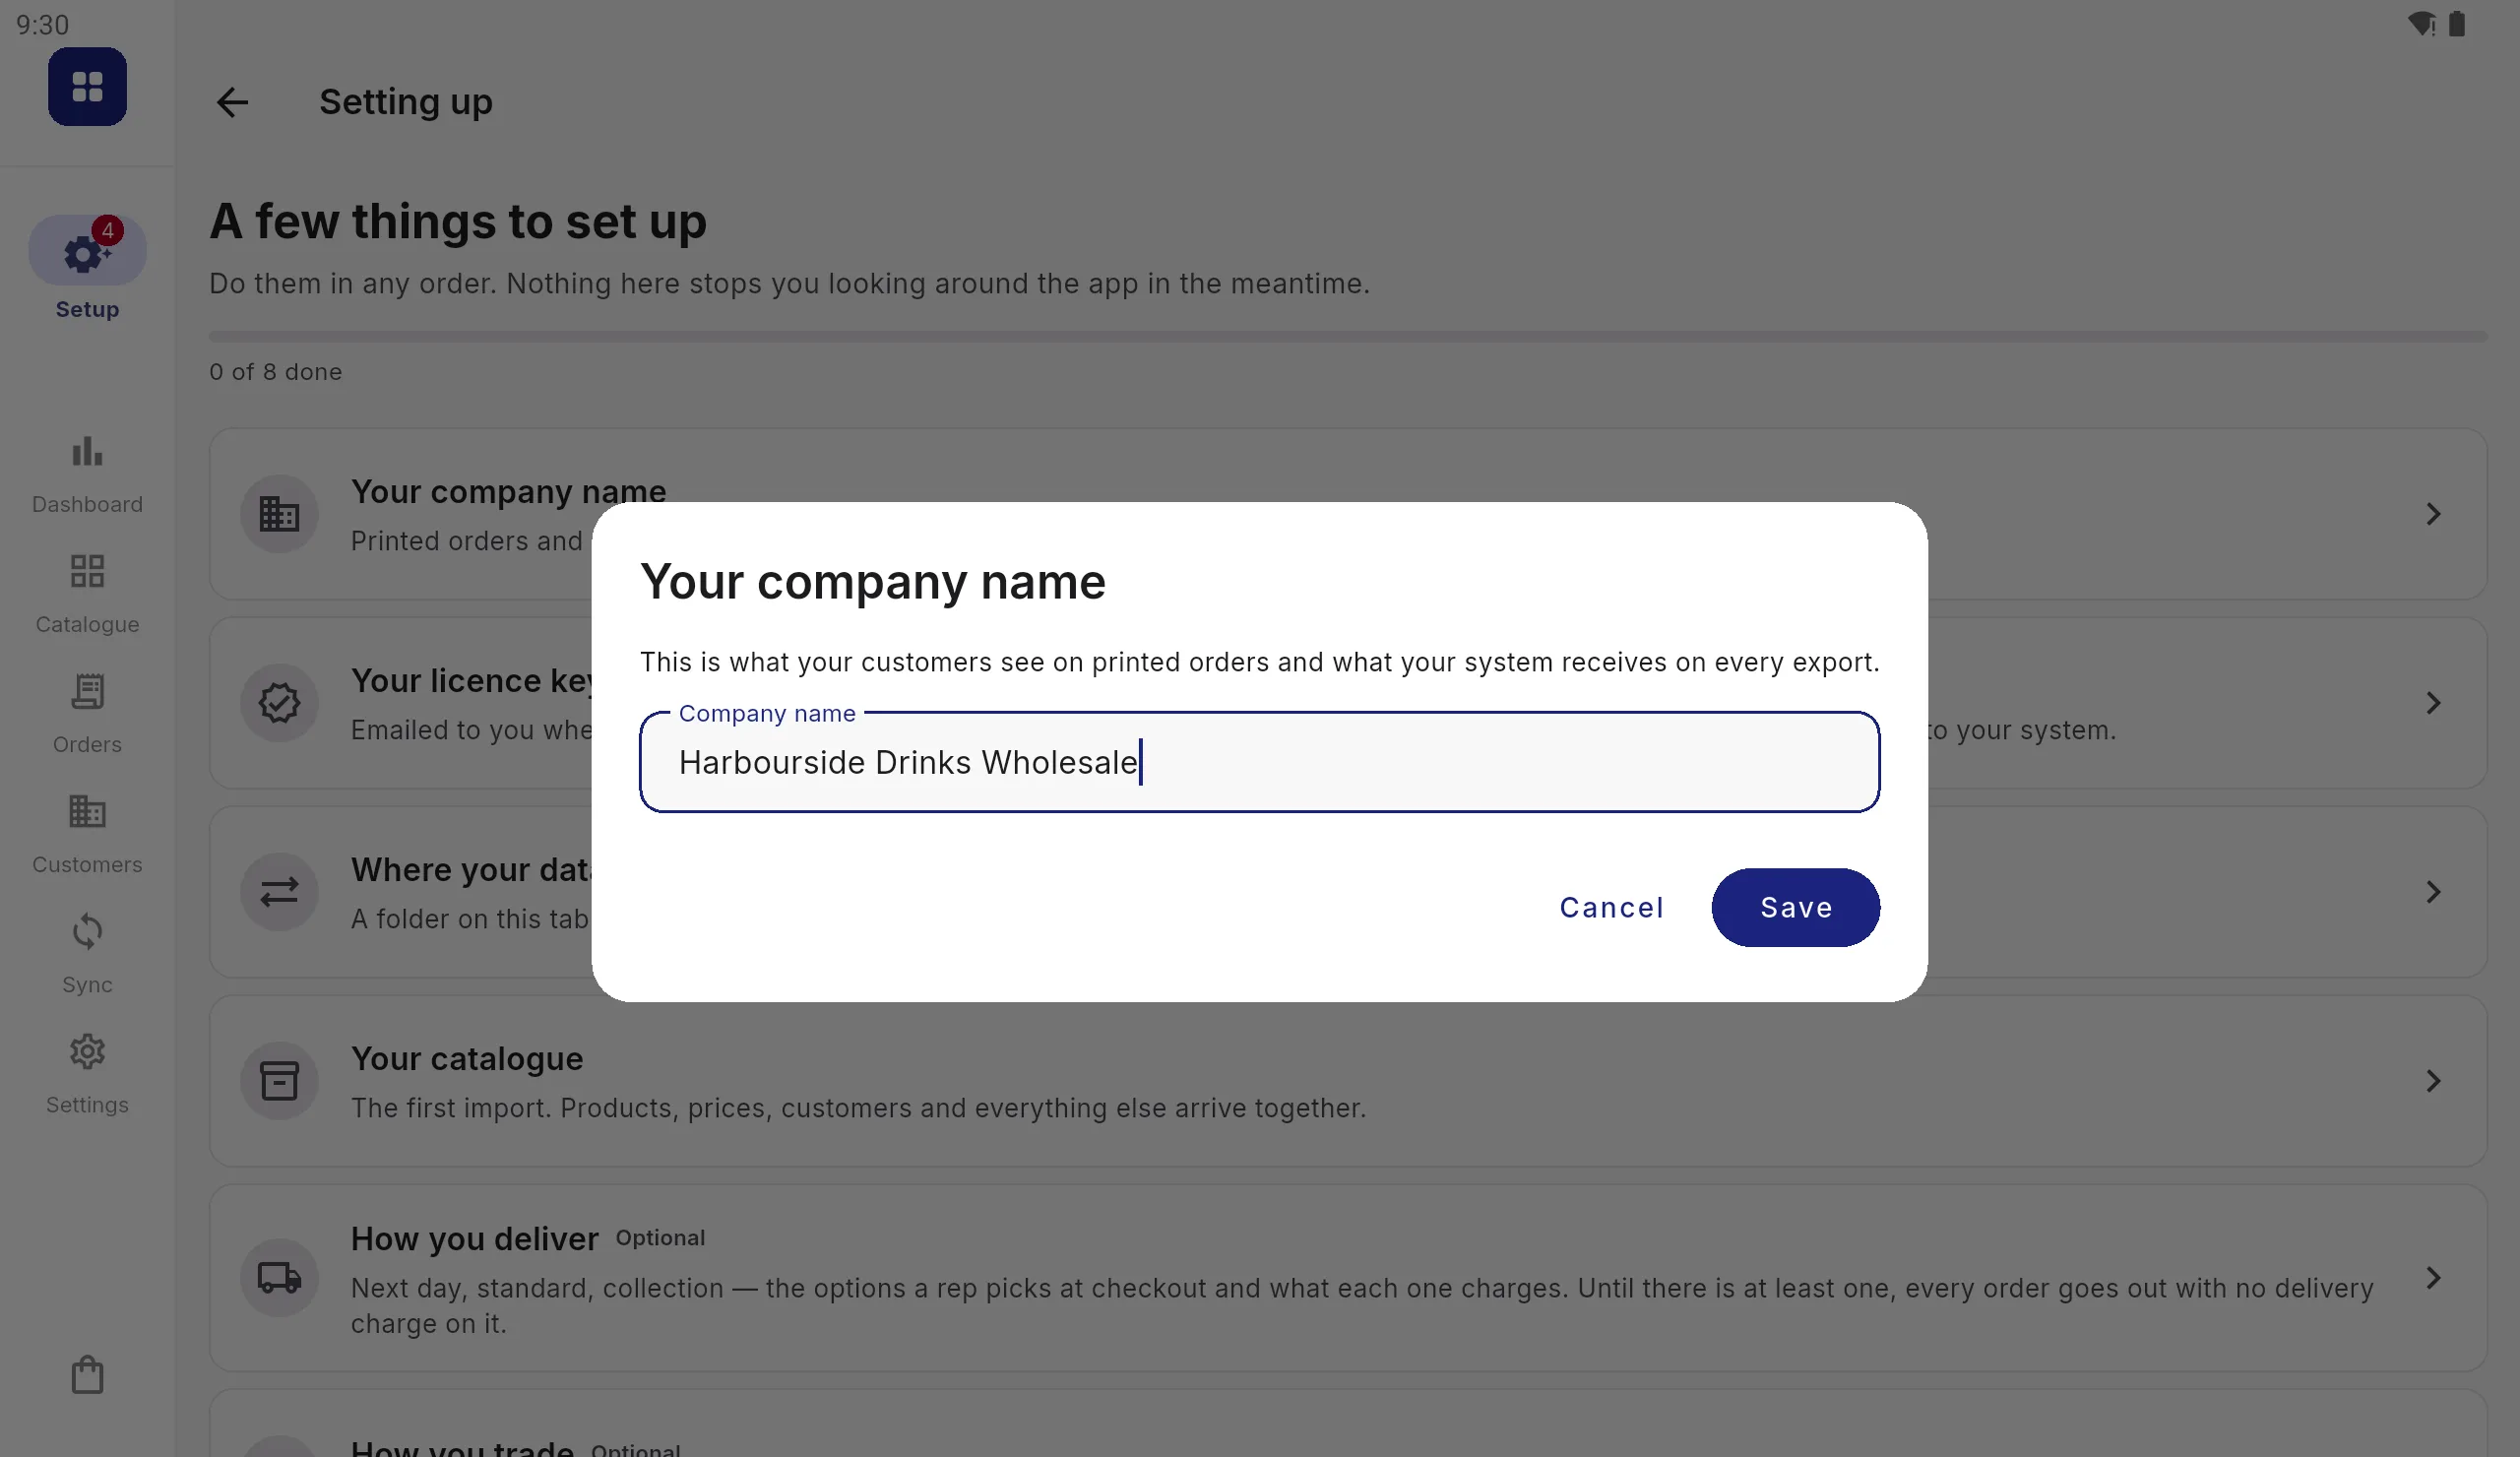
Each user gets a 4-digit PIN and five backup codes. Write the backup codes down when they are shown; they are not displayed again. They are the only way back in if a PIN is forgotten.
3. Choosing how data moves
All of this is in Settings › Data Integration › Sync & Integration. The setup checklist’s Where your data comes from opens the same place.
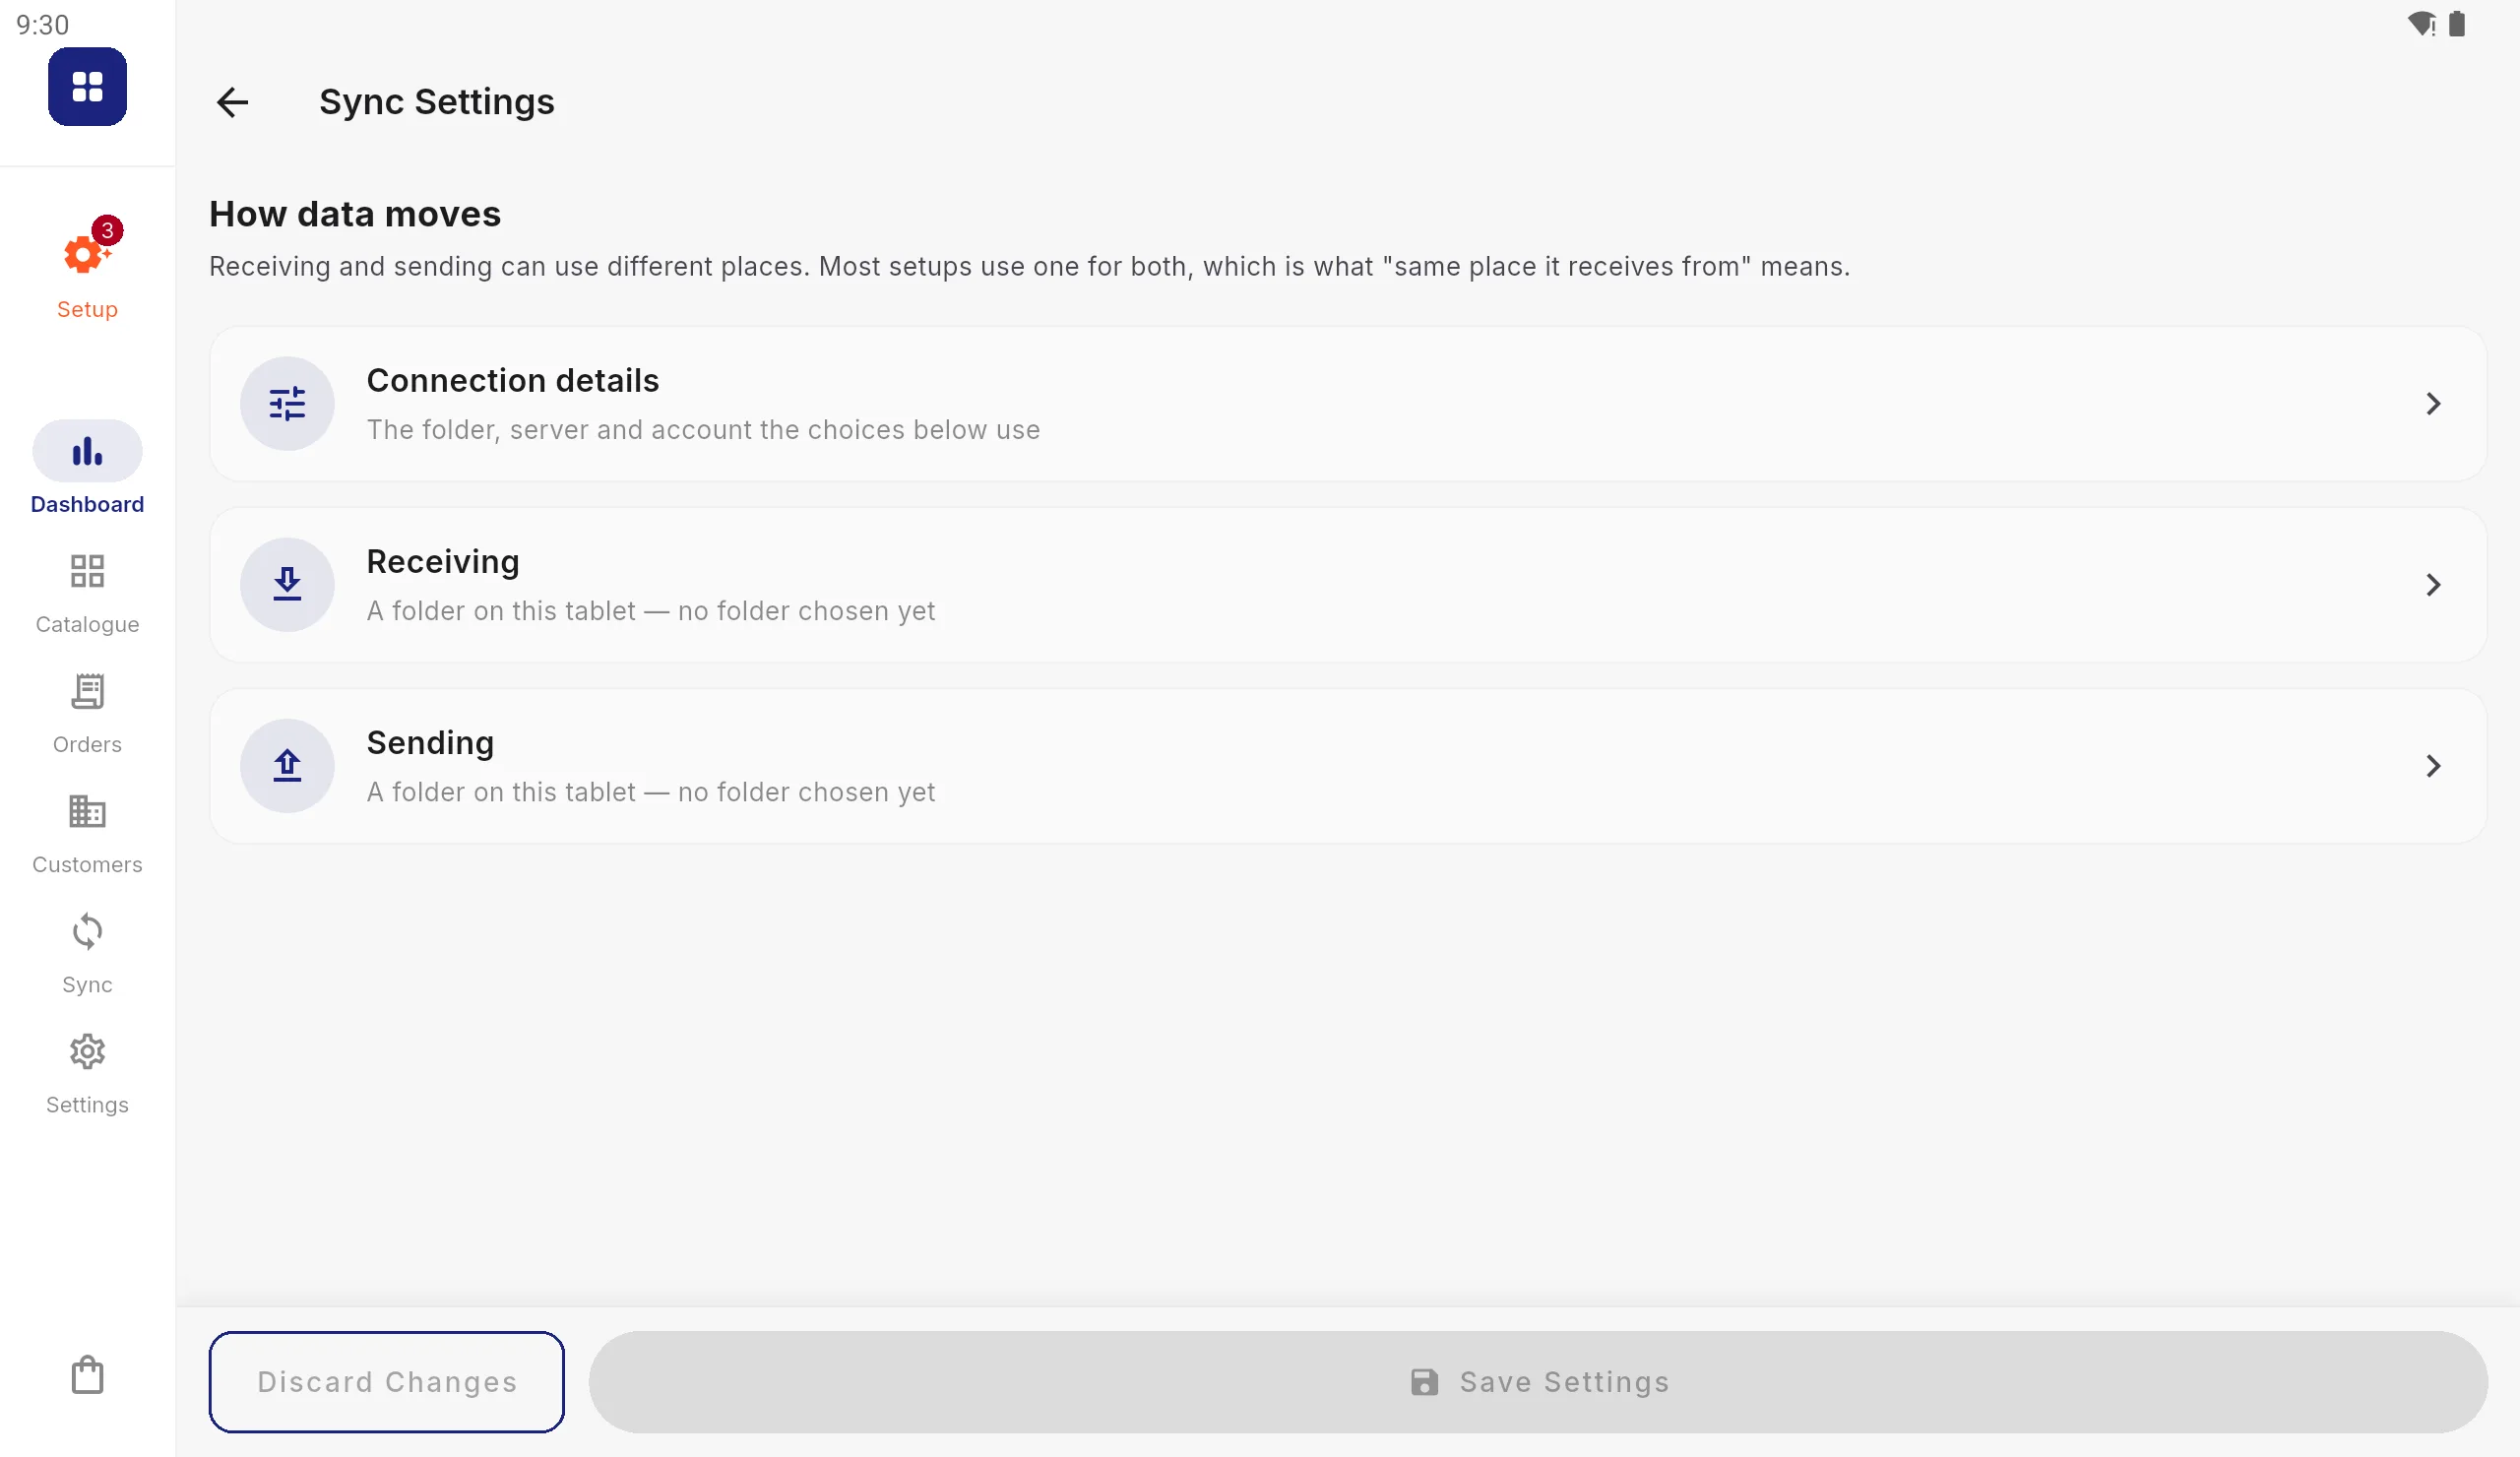
- Connection details holds the three connections (Folder on this tablet, FTP / SFTP server and Google Drive), each on its own page, each showing whether it is set up. Set up only the ones you need.
- Receiving chooses where the catalogue, customers and images come from.
- Sending chooses where orders and new customers go. Same place it receives from is right for most businesses.
Under each choice, Set up or Change goes straight to that connection’s page. The guides take each one step by step:
- Connect a folder on the tablet. The simplest option and the one to start with. Nothing to sign in to.
- Connect an FTP or SFTP server. For a business whose system already publishes files to a server.
- Send orders to Google Drive. Orders out only. Drive cannot supply a catalogue, customers or prices, so a tablet sending to Drive still receives from a folder or a server.
Reading everything again
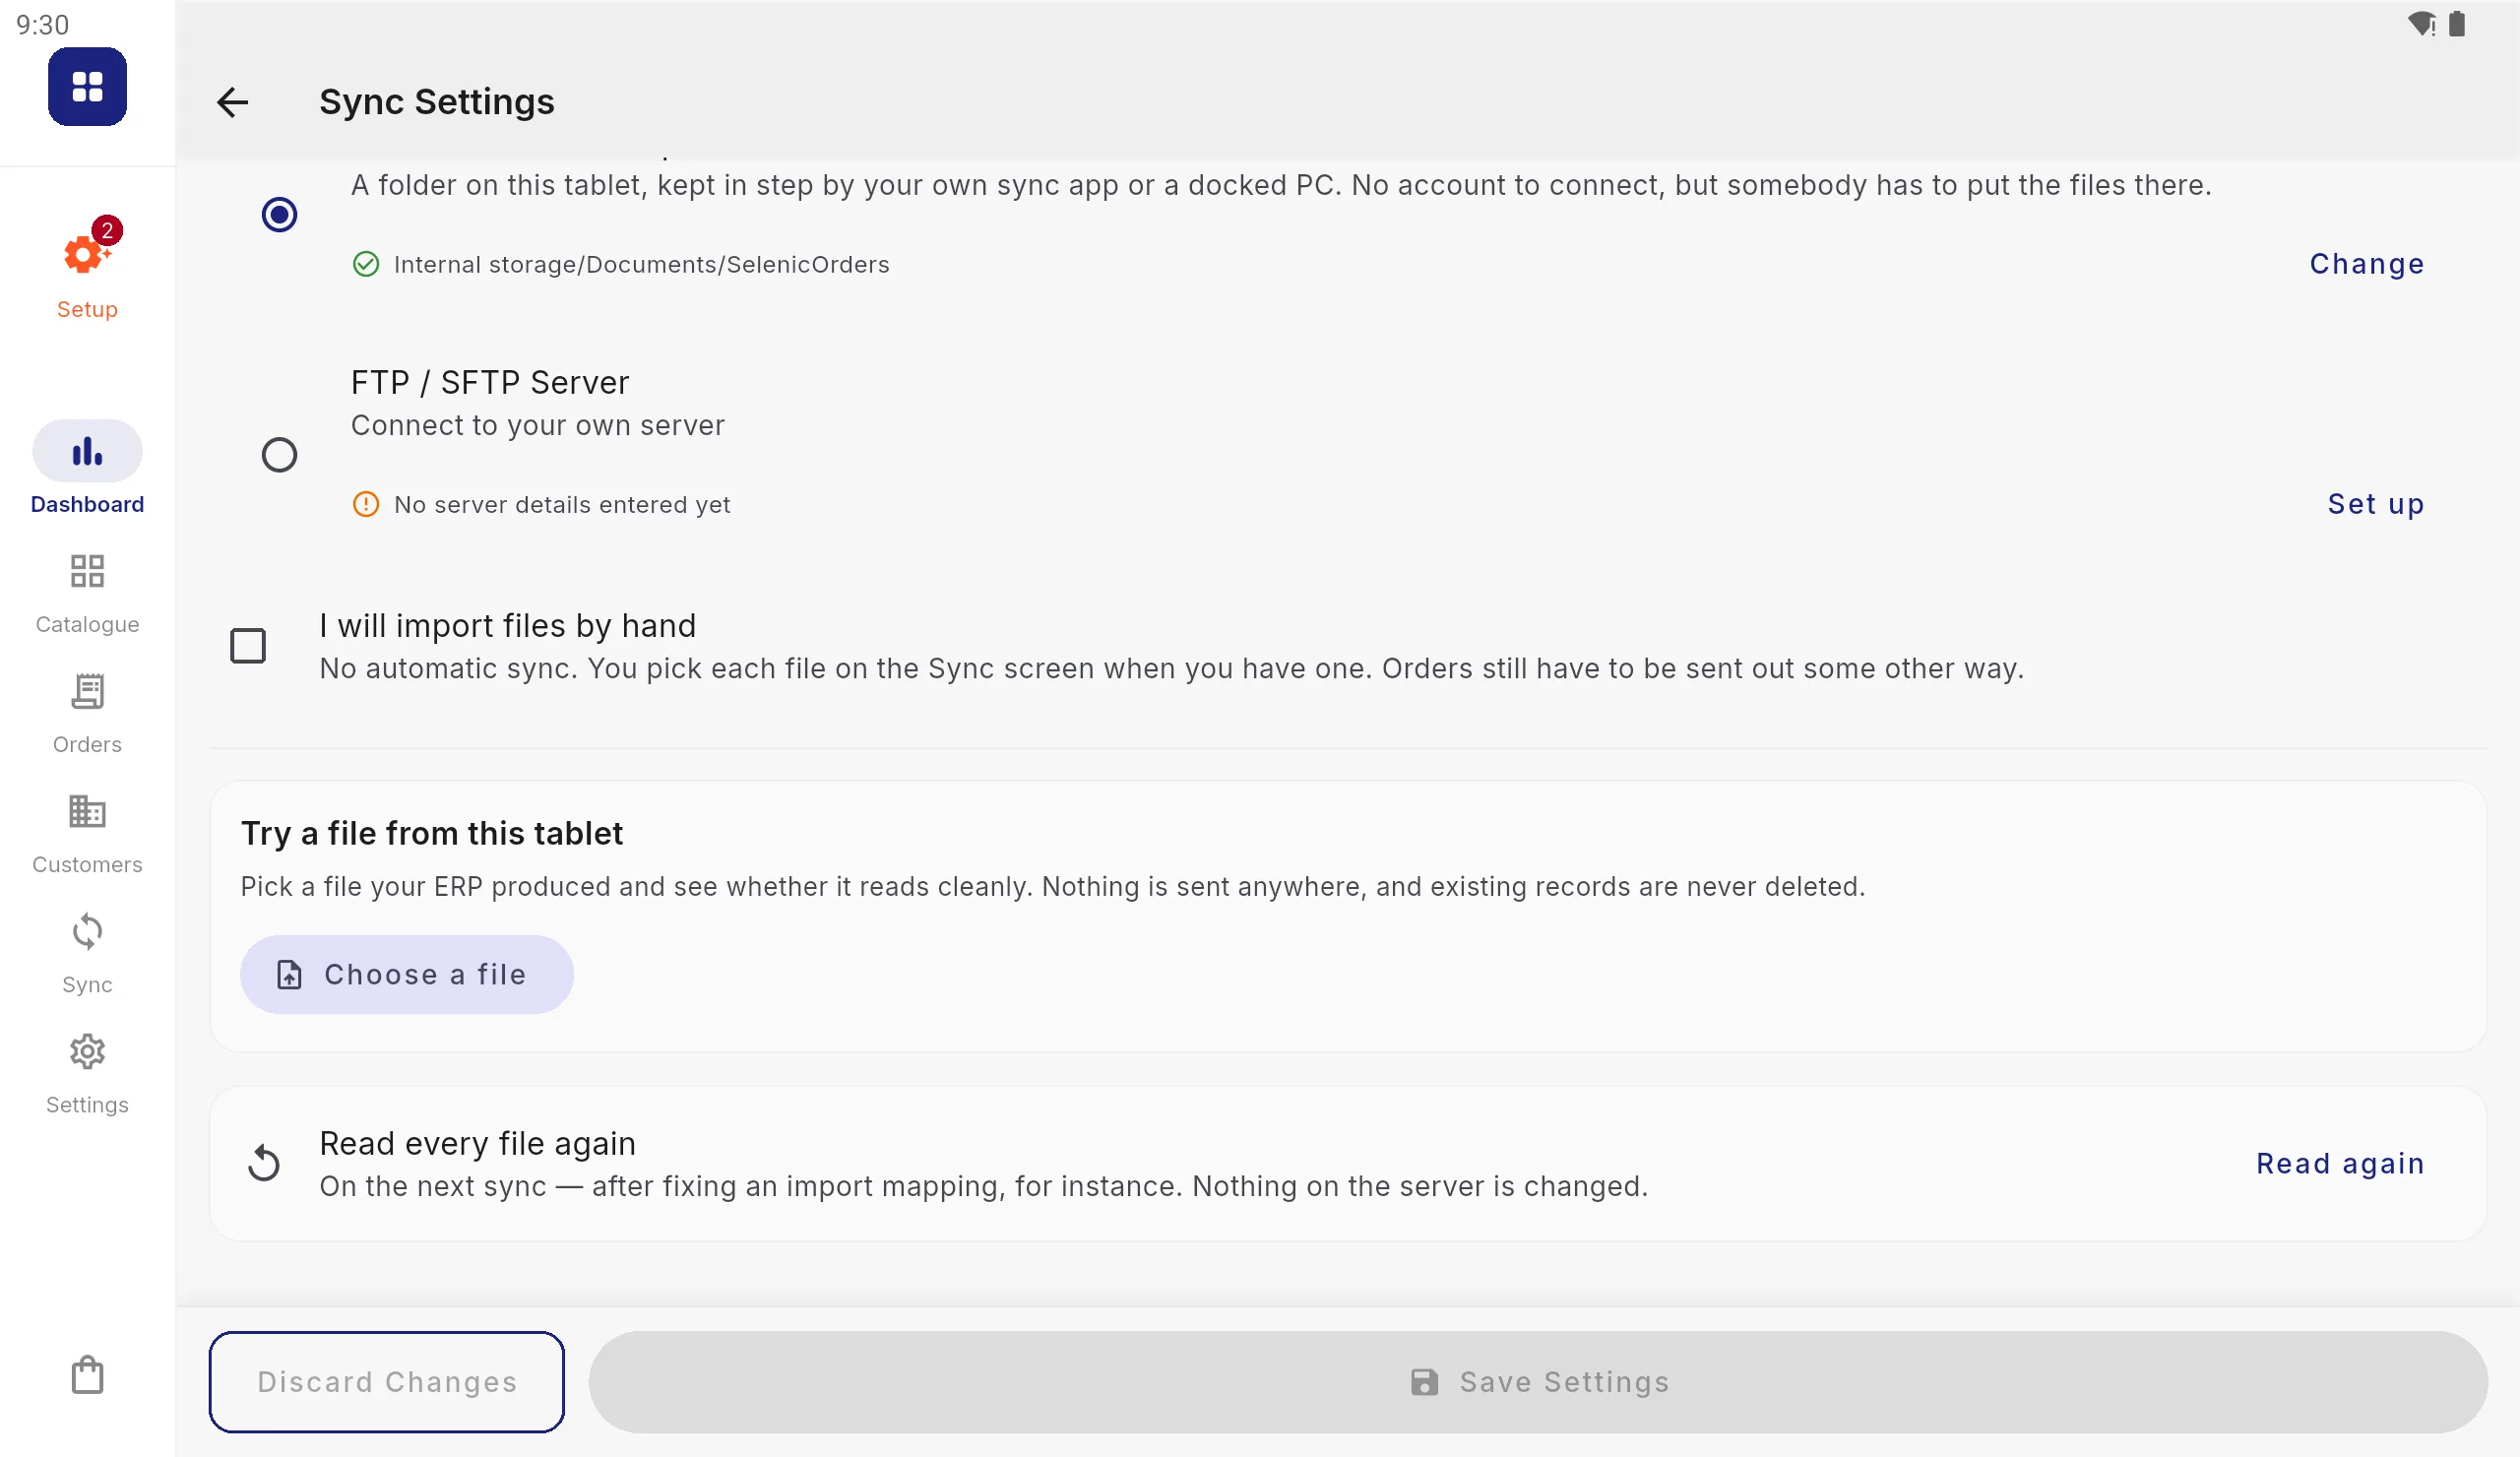
After you change an import profile, files a tablet has already read are not
read again on their own, because nothing about them changed. Read every file
again, at the bottom of Receiving, makes the next sync read every file in
Inbound again, oldest first. The app also offers this when you save a changed
mapping. Nothing on the server or in the folder is changed.
4. What a sync actually does
In order:
- Pull configuration: settings shared from another device
- Push orders and new customers: anything pending goes out
- Pull inbound files and import them
- Push configuration
- Pull images and process them
Exporting happens before importing, deliberately. A change a rep made on site is delivered before the ERP’s copy comes back and overwrites it. The other way round, edits made during the day would be silently lost.
If a sync fails
Nothing is lost. Orders are only marked as sent once the file has actually been written, so an interrupted sync leaves them pending and they go out next time. The log says what failed and names the file.
A file that failed to import is tried again next sync, and the log says why, unless a newer file of the same kind has been read since: then it is replaced, not retried. Fix and replace it rather than renaming it.
Nothing in Inbound is ever moved or deleted by the app. Every tablet reads
the same folder and keeps its own note of what it has already read, so a
second tablet gets everything the first did, and each sync reads only what is
new to that tablet.
5. Day-to-day
Sync at the start and end of the day. The app is built to run for days without a connection, but orders only reach you once a sync has run.
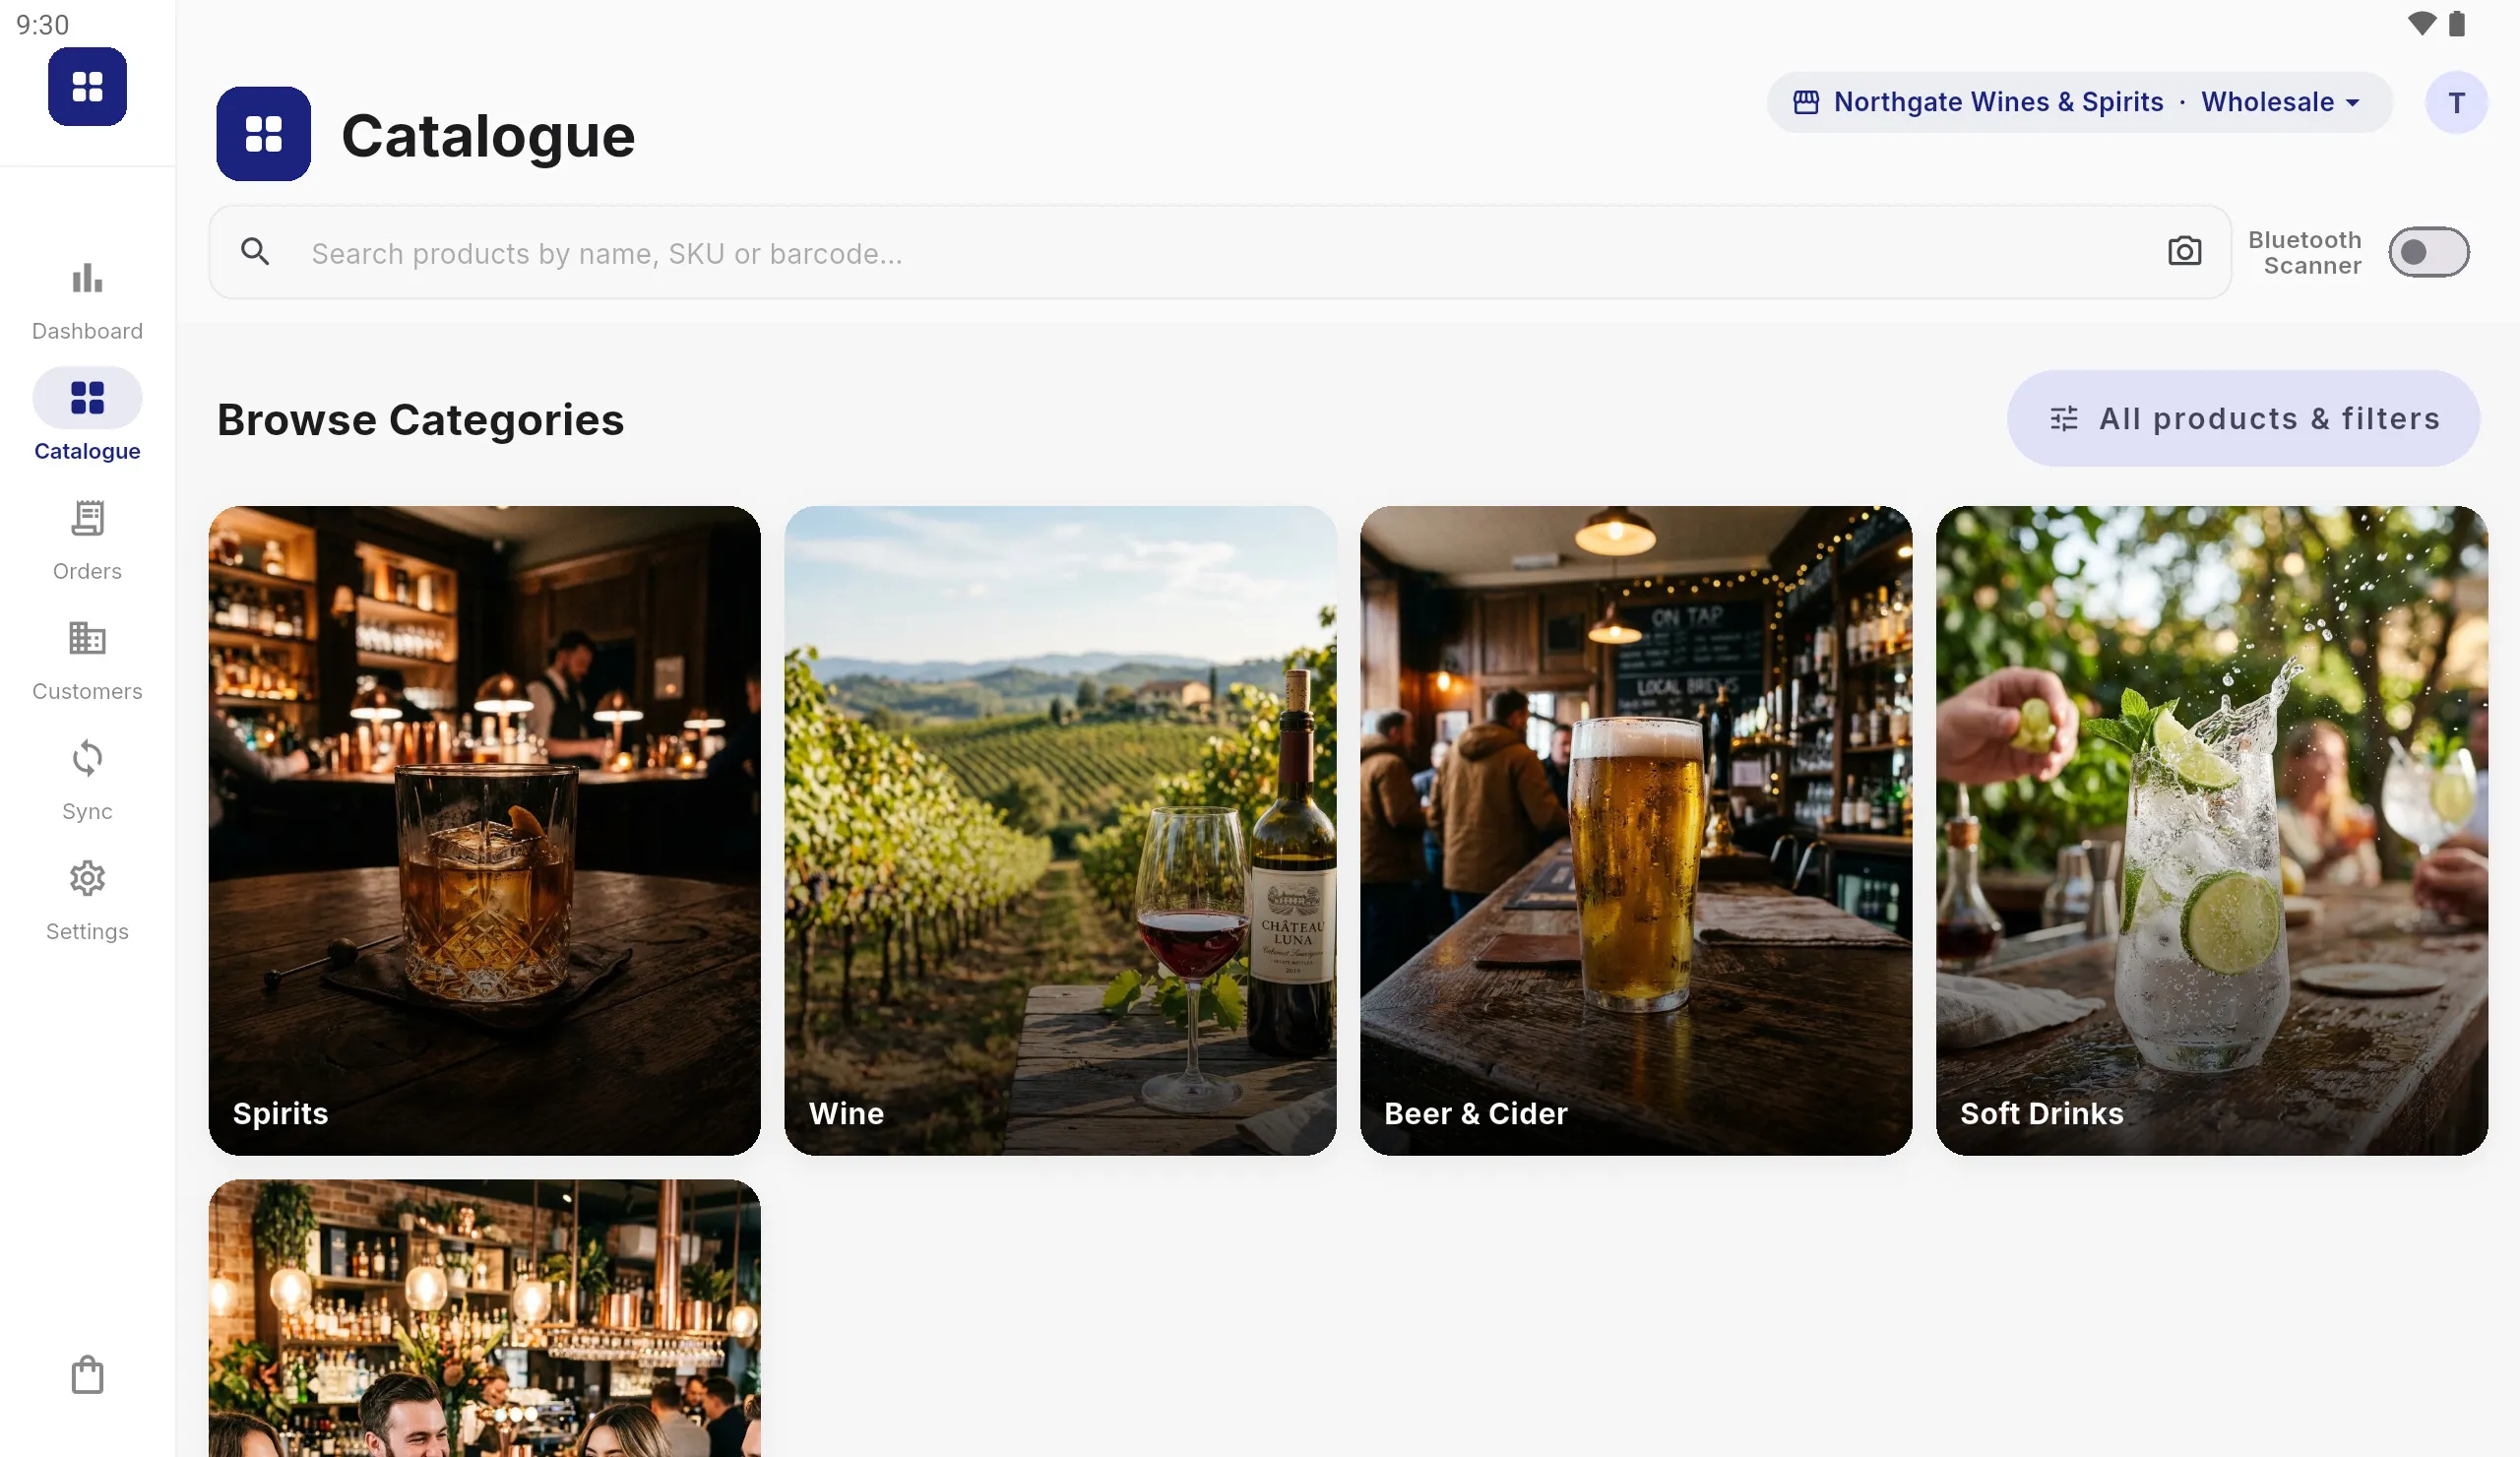
Scanning barcodes. Tap the camera button in the catalogue’s search box and point the tablet at a product’s barcode: the app opens that product to add to the order. A Bluetooth or USB barcode scanner works too: switch on Bluetooth Scanner beside the search box, and every scan opens its product straight away, whichever screen the rep is on. Typing a barcode into the search box finds the product as well.
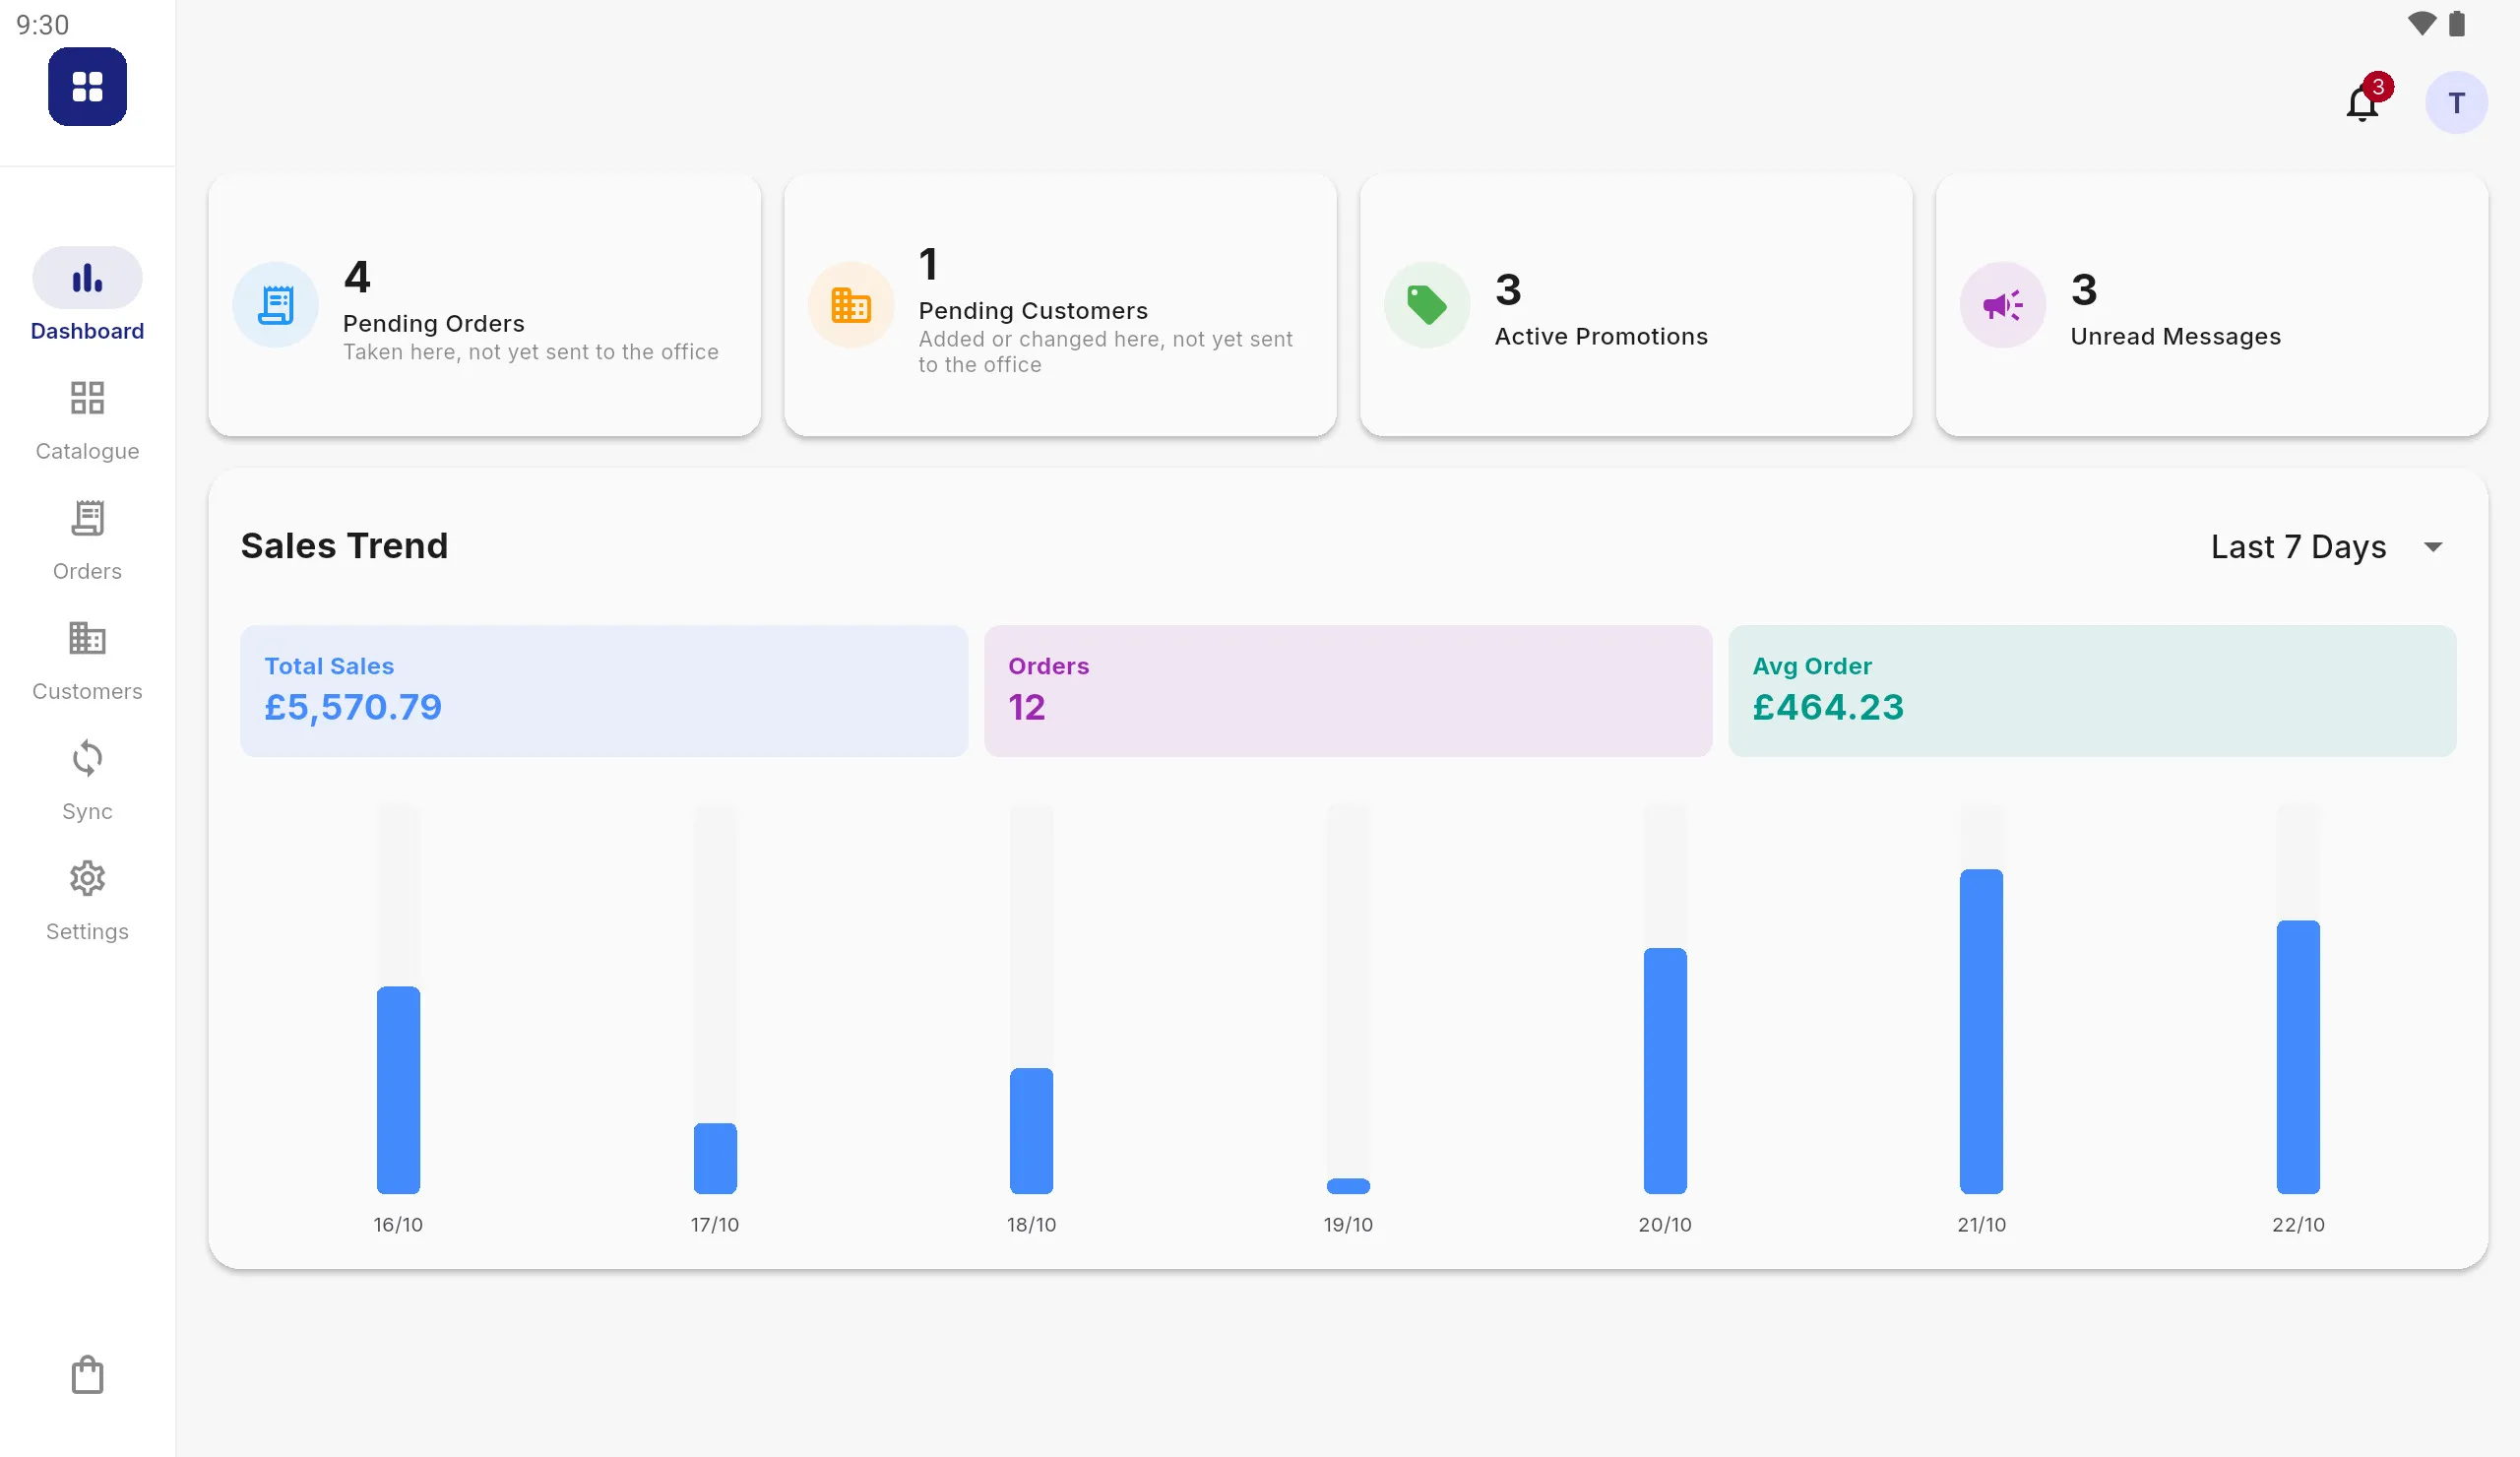
The tablet locks itself after 10 minutes of inactivity, and needs a PIN to resume. The cart survives, so a rep mid-order loses nothing but four taps. Change or disable it in Settings › Business Rules › Auto-Logout Timer.
That default exists because the tablet holds every customer’s contacts, addresses, credit limits and order history. A rep who leaves it on a counter while they take a call leaves all of that visible. Ten minutes is a compromise between that and interrupting a long conversation. If reps find it intrusive, 30 minutes is far better than switching it off.
6. Configuration shared between devices
Settings can be shared: one tablet pushes its configuration, others pick it up. Useful for branding, business rules, tax setup and import profiles.
Three things never travel, by design:
- Credentials: FTP passwords and SSH keys stay on the device that set them
- The tablet’s folder: Android gives each tablet permission for the folder chosen on that tablet, so each one chooses its own
- Order Prefix: each tablet keeps its own
Order numbers count up on each tablet, and there is no server handing them
out. Every number carries the tablet’s own ID, such as ORD-K7M3-0001,
so two tablets on the same prefix can never send the same number. The Tablet
ID is under Settings › About & help › About.
7. Replacing a tablet
Selenic Orders keeps itself out of Android’s backup and out of the transfer when a new tablet is set up from an old one. Your catalogue, customers, users and shared settings come back on the first sync, so replacing a tablet costs nothing that lives in your sync folder. Three things live only on the tablet:
- Orders not yet sent. Sync before a tablet is retired.
- Its own connection details: the server password, or the Google sign-in for Drive. Type them again on the new tablet.
- Its place on your licence. An administrator can remove the old tablet in Settings › Licence on any tablet (press Remove beside it), then enter your key on the new one.
8. Things worth knowing
Sale prices and promotions respect their dates. Blank means unbounded, and an end date includes the whole day it names: “valid until 9 August” means the customer still gets it on the 9th.
A new customer created offline gets a temporary account id beginning NEW-.
Your ERP should create the account and echo that id back so the placeholder can
be replaced. Without it, the tablet keeps both records.
Discontinued products stay visible with a status badge, so remaining stock can still be sold.
Product images are never deleted, because one image may serve several products. Replacing one means writing over the same filename.
9. If something looks wrong
| What you see | Try |
|---|---|
| Catalogue empty after a sync | Check the filename rules in Connecting your ERP; a file whose name matches nothing is skipped |
| Fields empty after an import | Column names do not match; see Import profiles, then Read every file again |
| Prices wrong for one customer | Check their price list assignment, then Business Rules › volume discount overrides |
| Orders not reaching the ERP | Check Outbound; if the files are there, the app has done its part |
| Sync Now refuses to run | The licence key has not been entered on this tablet; see the Quick Start |
| A rep cannot sign in | Use a backup code, then set a new PIN in Manage Users |
| Images missing | Filenames must match the SKU exactly, including case |
| Tax wrong on an export | Zero-rating needs a VAT or EORI number on the customer record. It arrives by import, or a rep can add it under the customer’s Tax & Legal |
The sync log is on the Sync screen and names files and reasons. It is the first place to look, and usually the last.